Lenovo T430 (Maximized)
Table of contents
⚠️ EOL: No microcode updates
This board’s CPU generation has reached End of Servicing Updates. See per-board EOL/ESU status for ESU dates and Heads threat model for security implications.
✅ PROTECTED: TPM GPIO Reset
Pre-Skylake platform — dedicated PLTRST# pin, not GPIO-shared. See Per-Board Protection Status, TPM GPIO Reset Vulnerability.
Hardware Compatibility
Hardware: t430 — see the Hardware Compatibility List.
⚡ Safety First
Before starting, please read our SPI Programmer Best Practices guide for essential safety information and programmer recommendations.
T430 Hardware Maintenance Manual
→ coreboot T430 documentation (chip layout, flashing instructions)
Disassembly
First remove the battery and the cable powering your device.
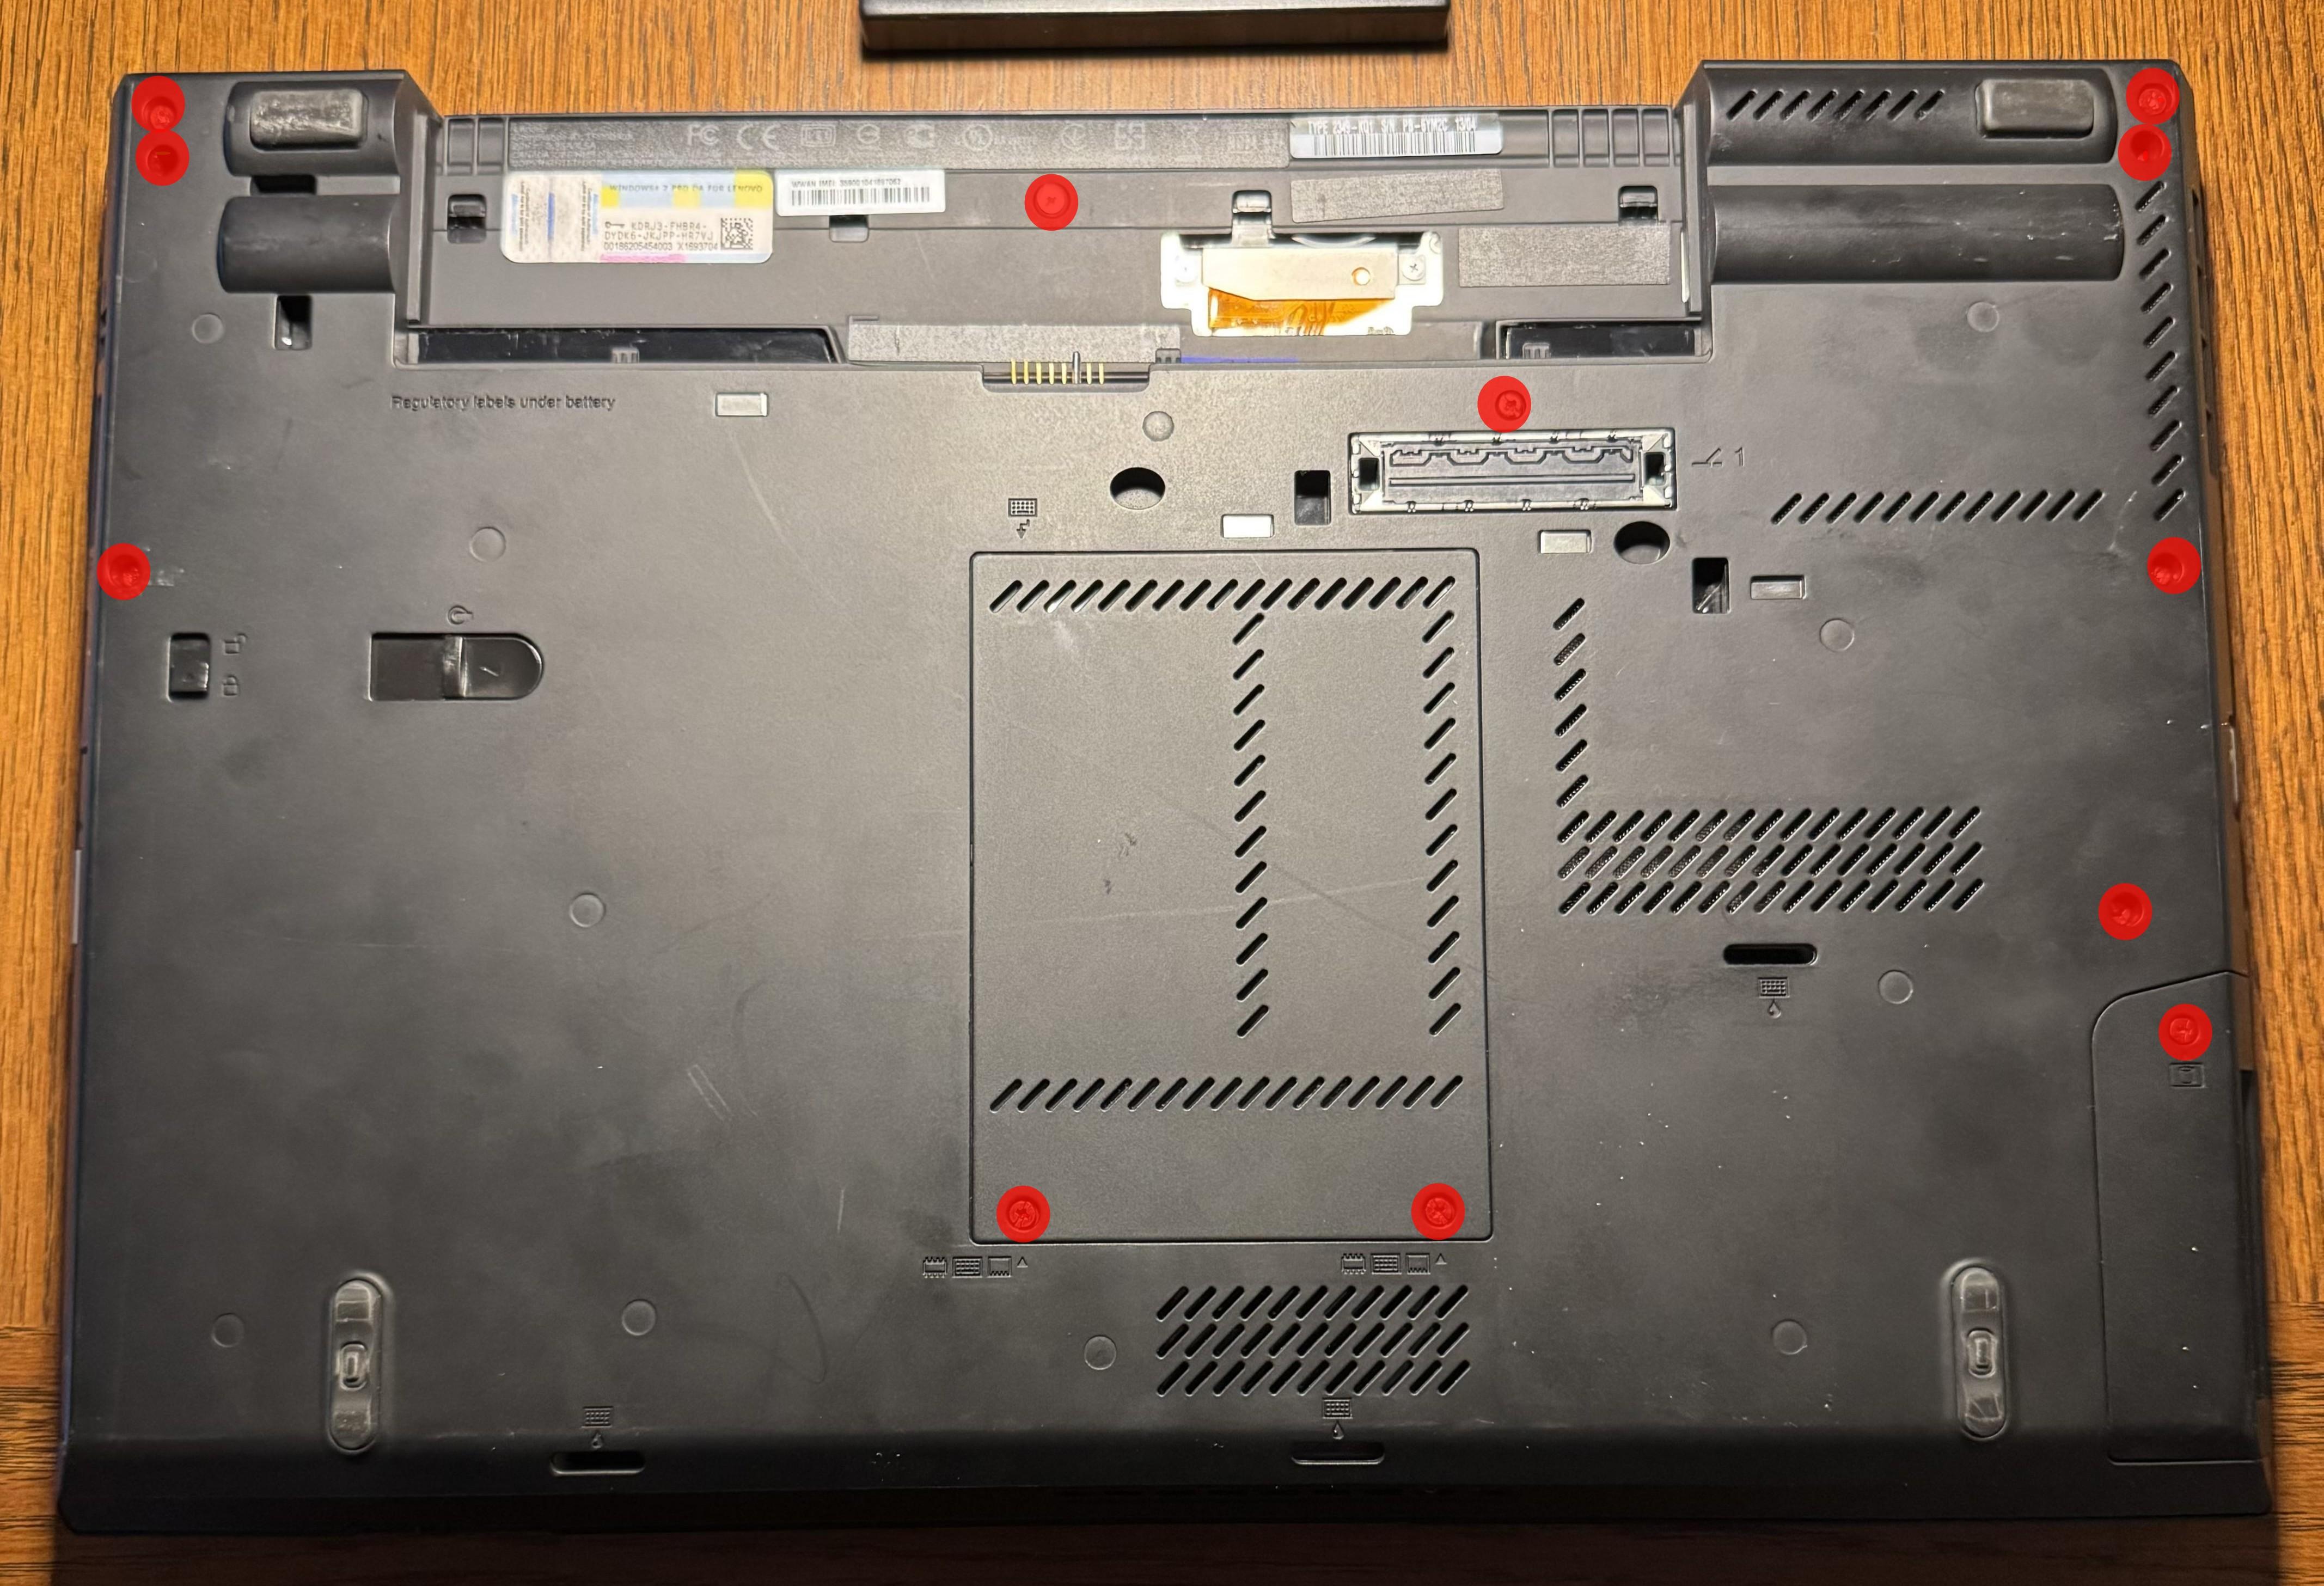
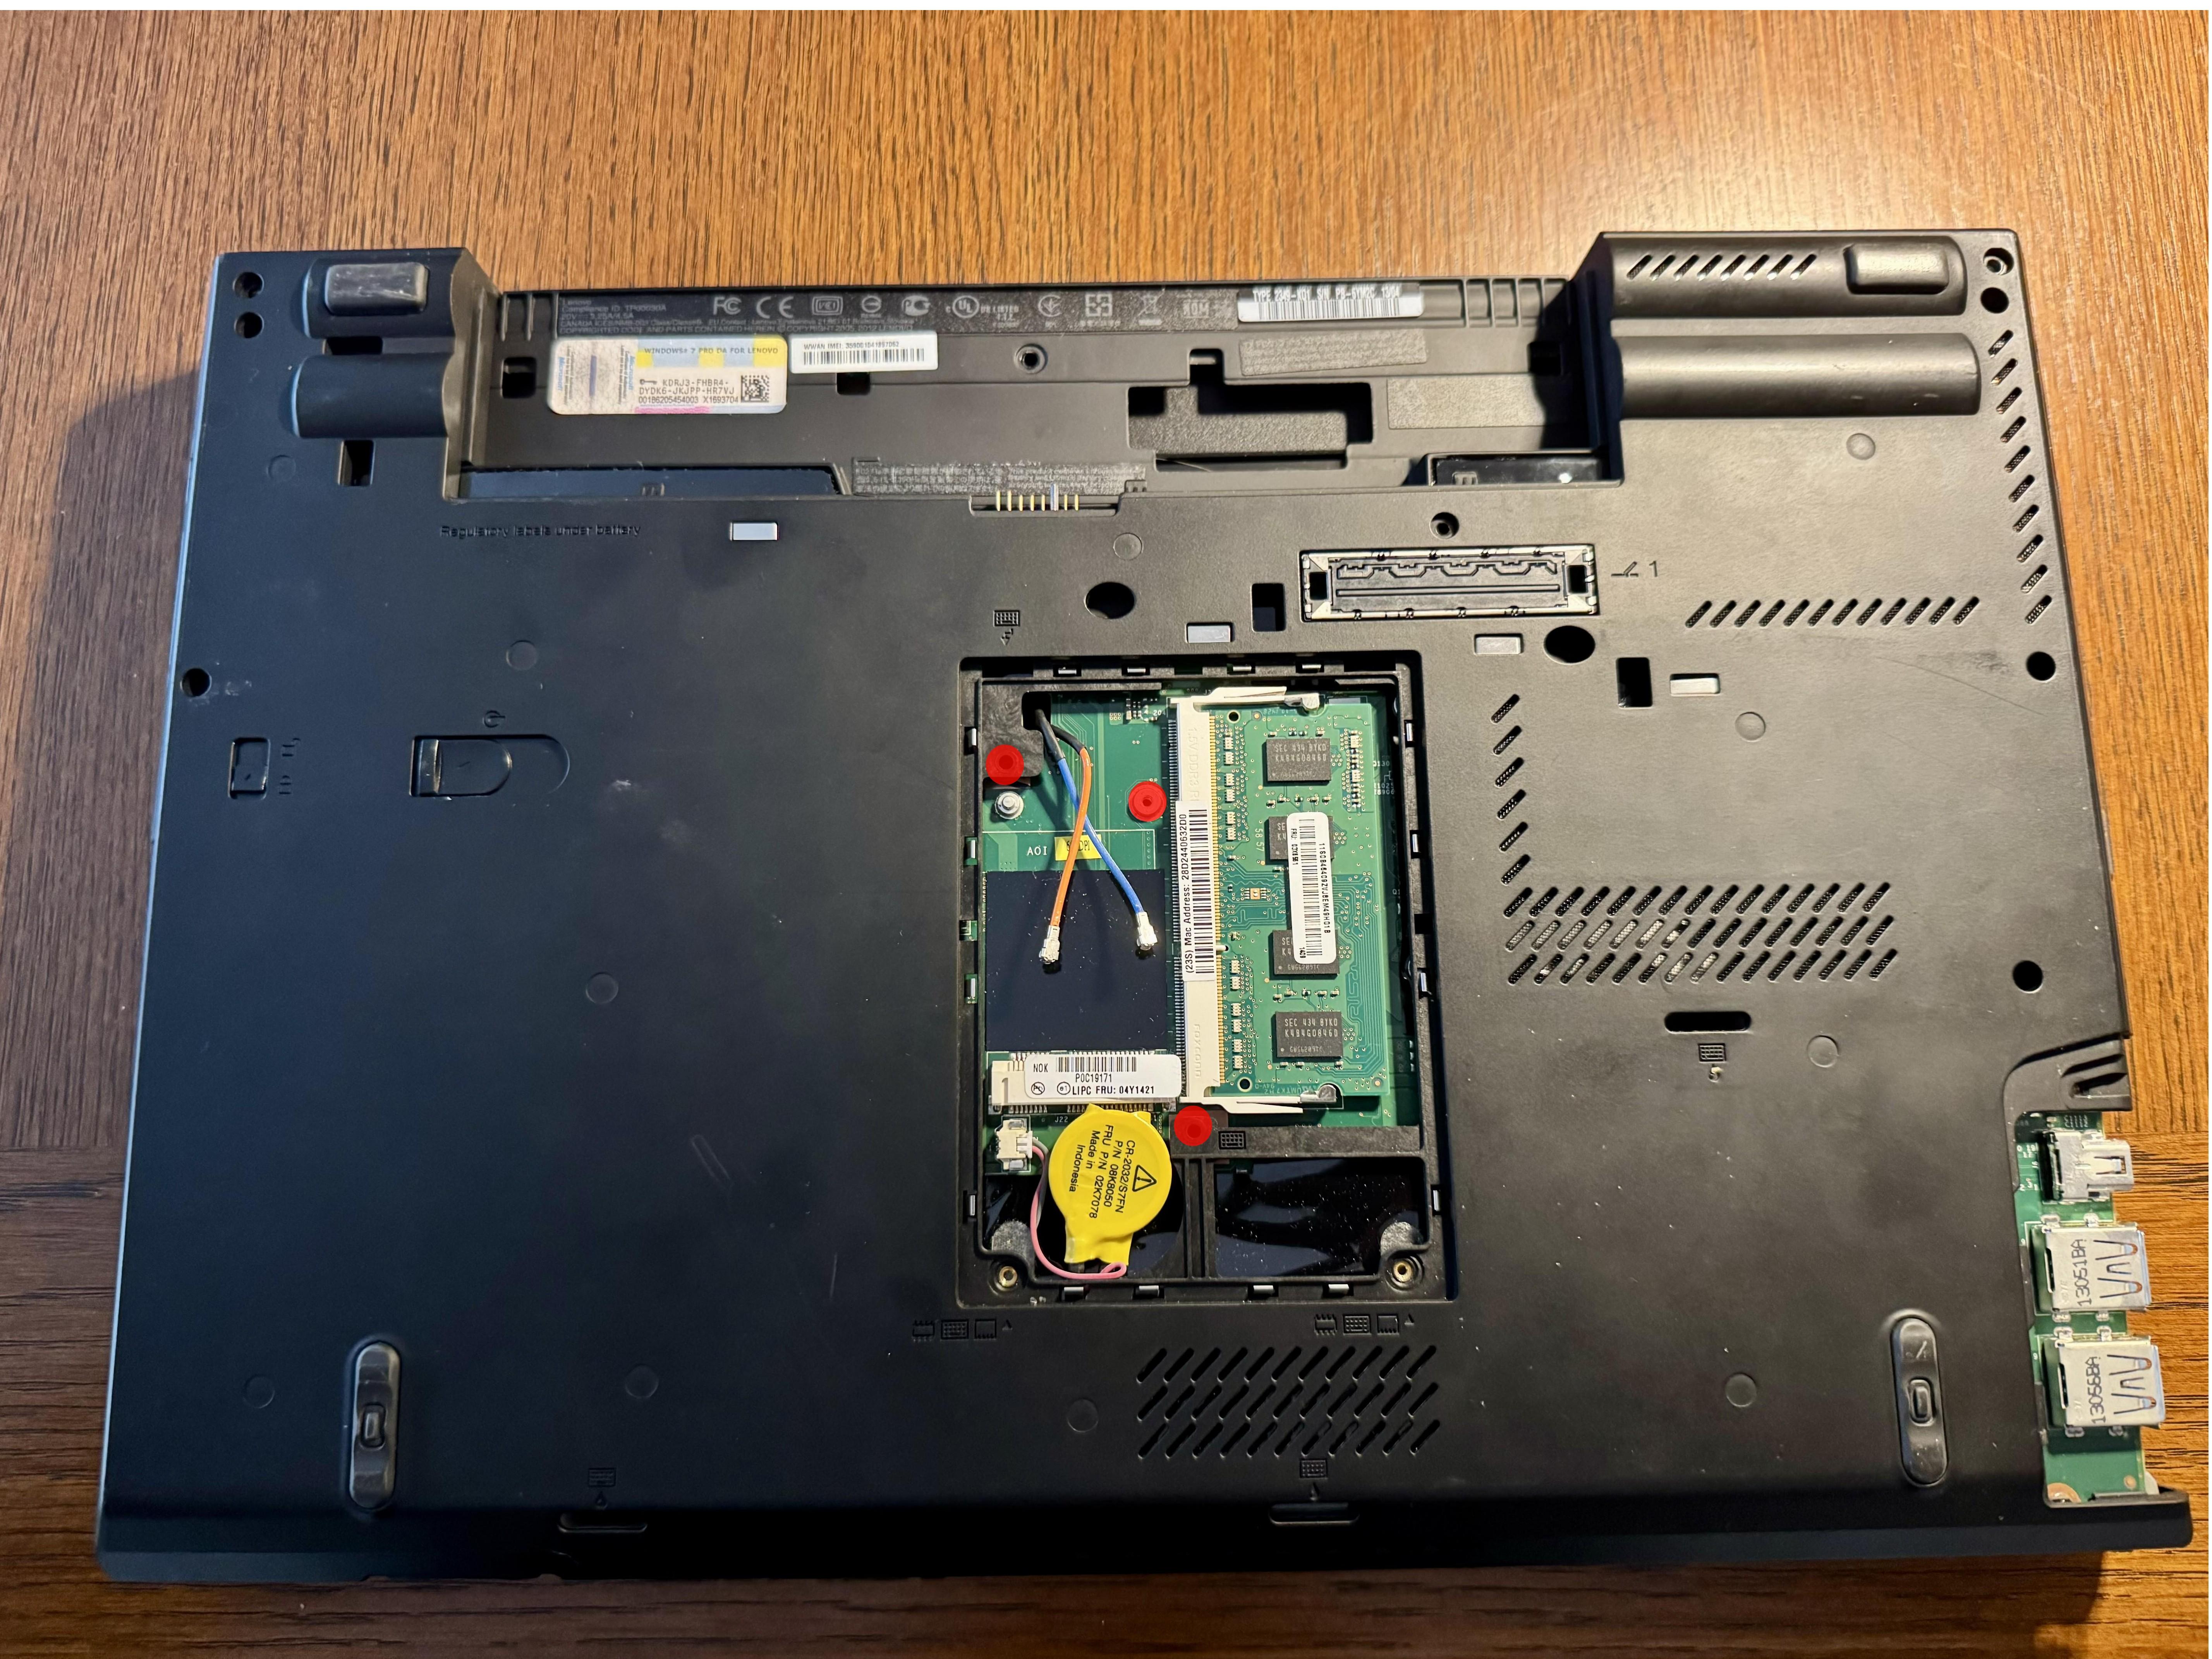
Removing these screws will allow you to remove the keyboard and palm rest.
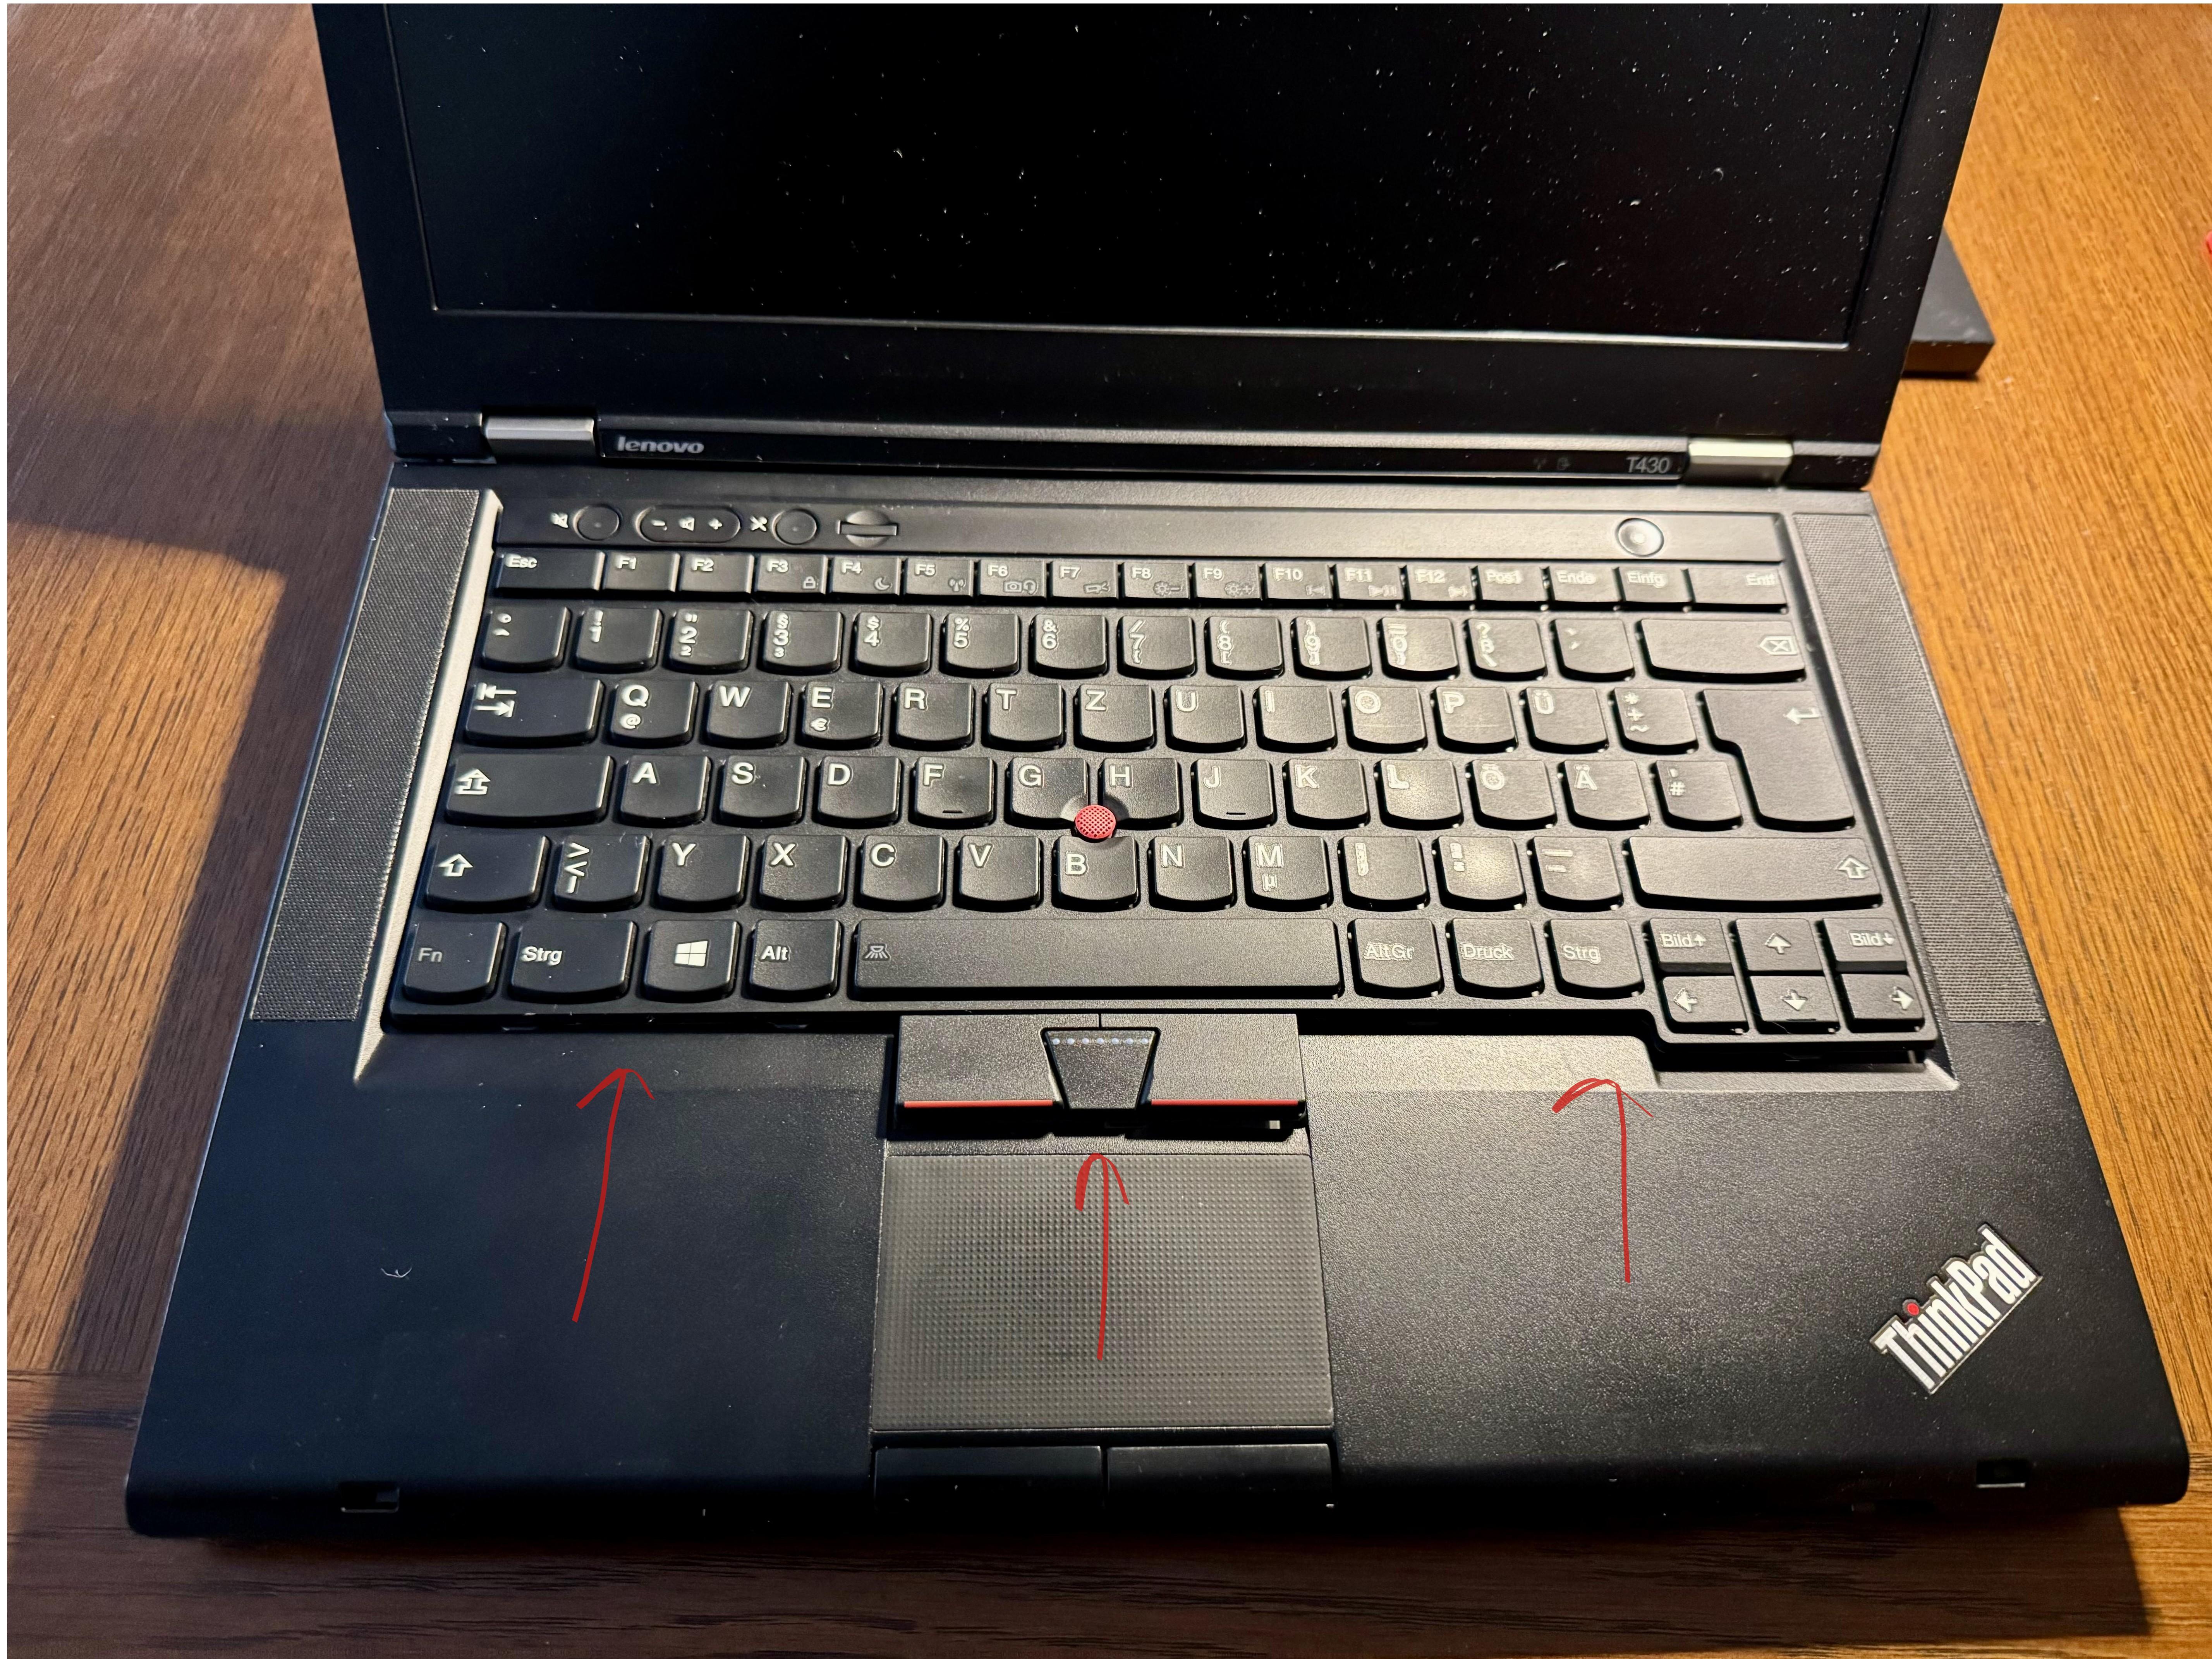
First, slightly shift the keyboard towards the screen.
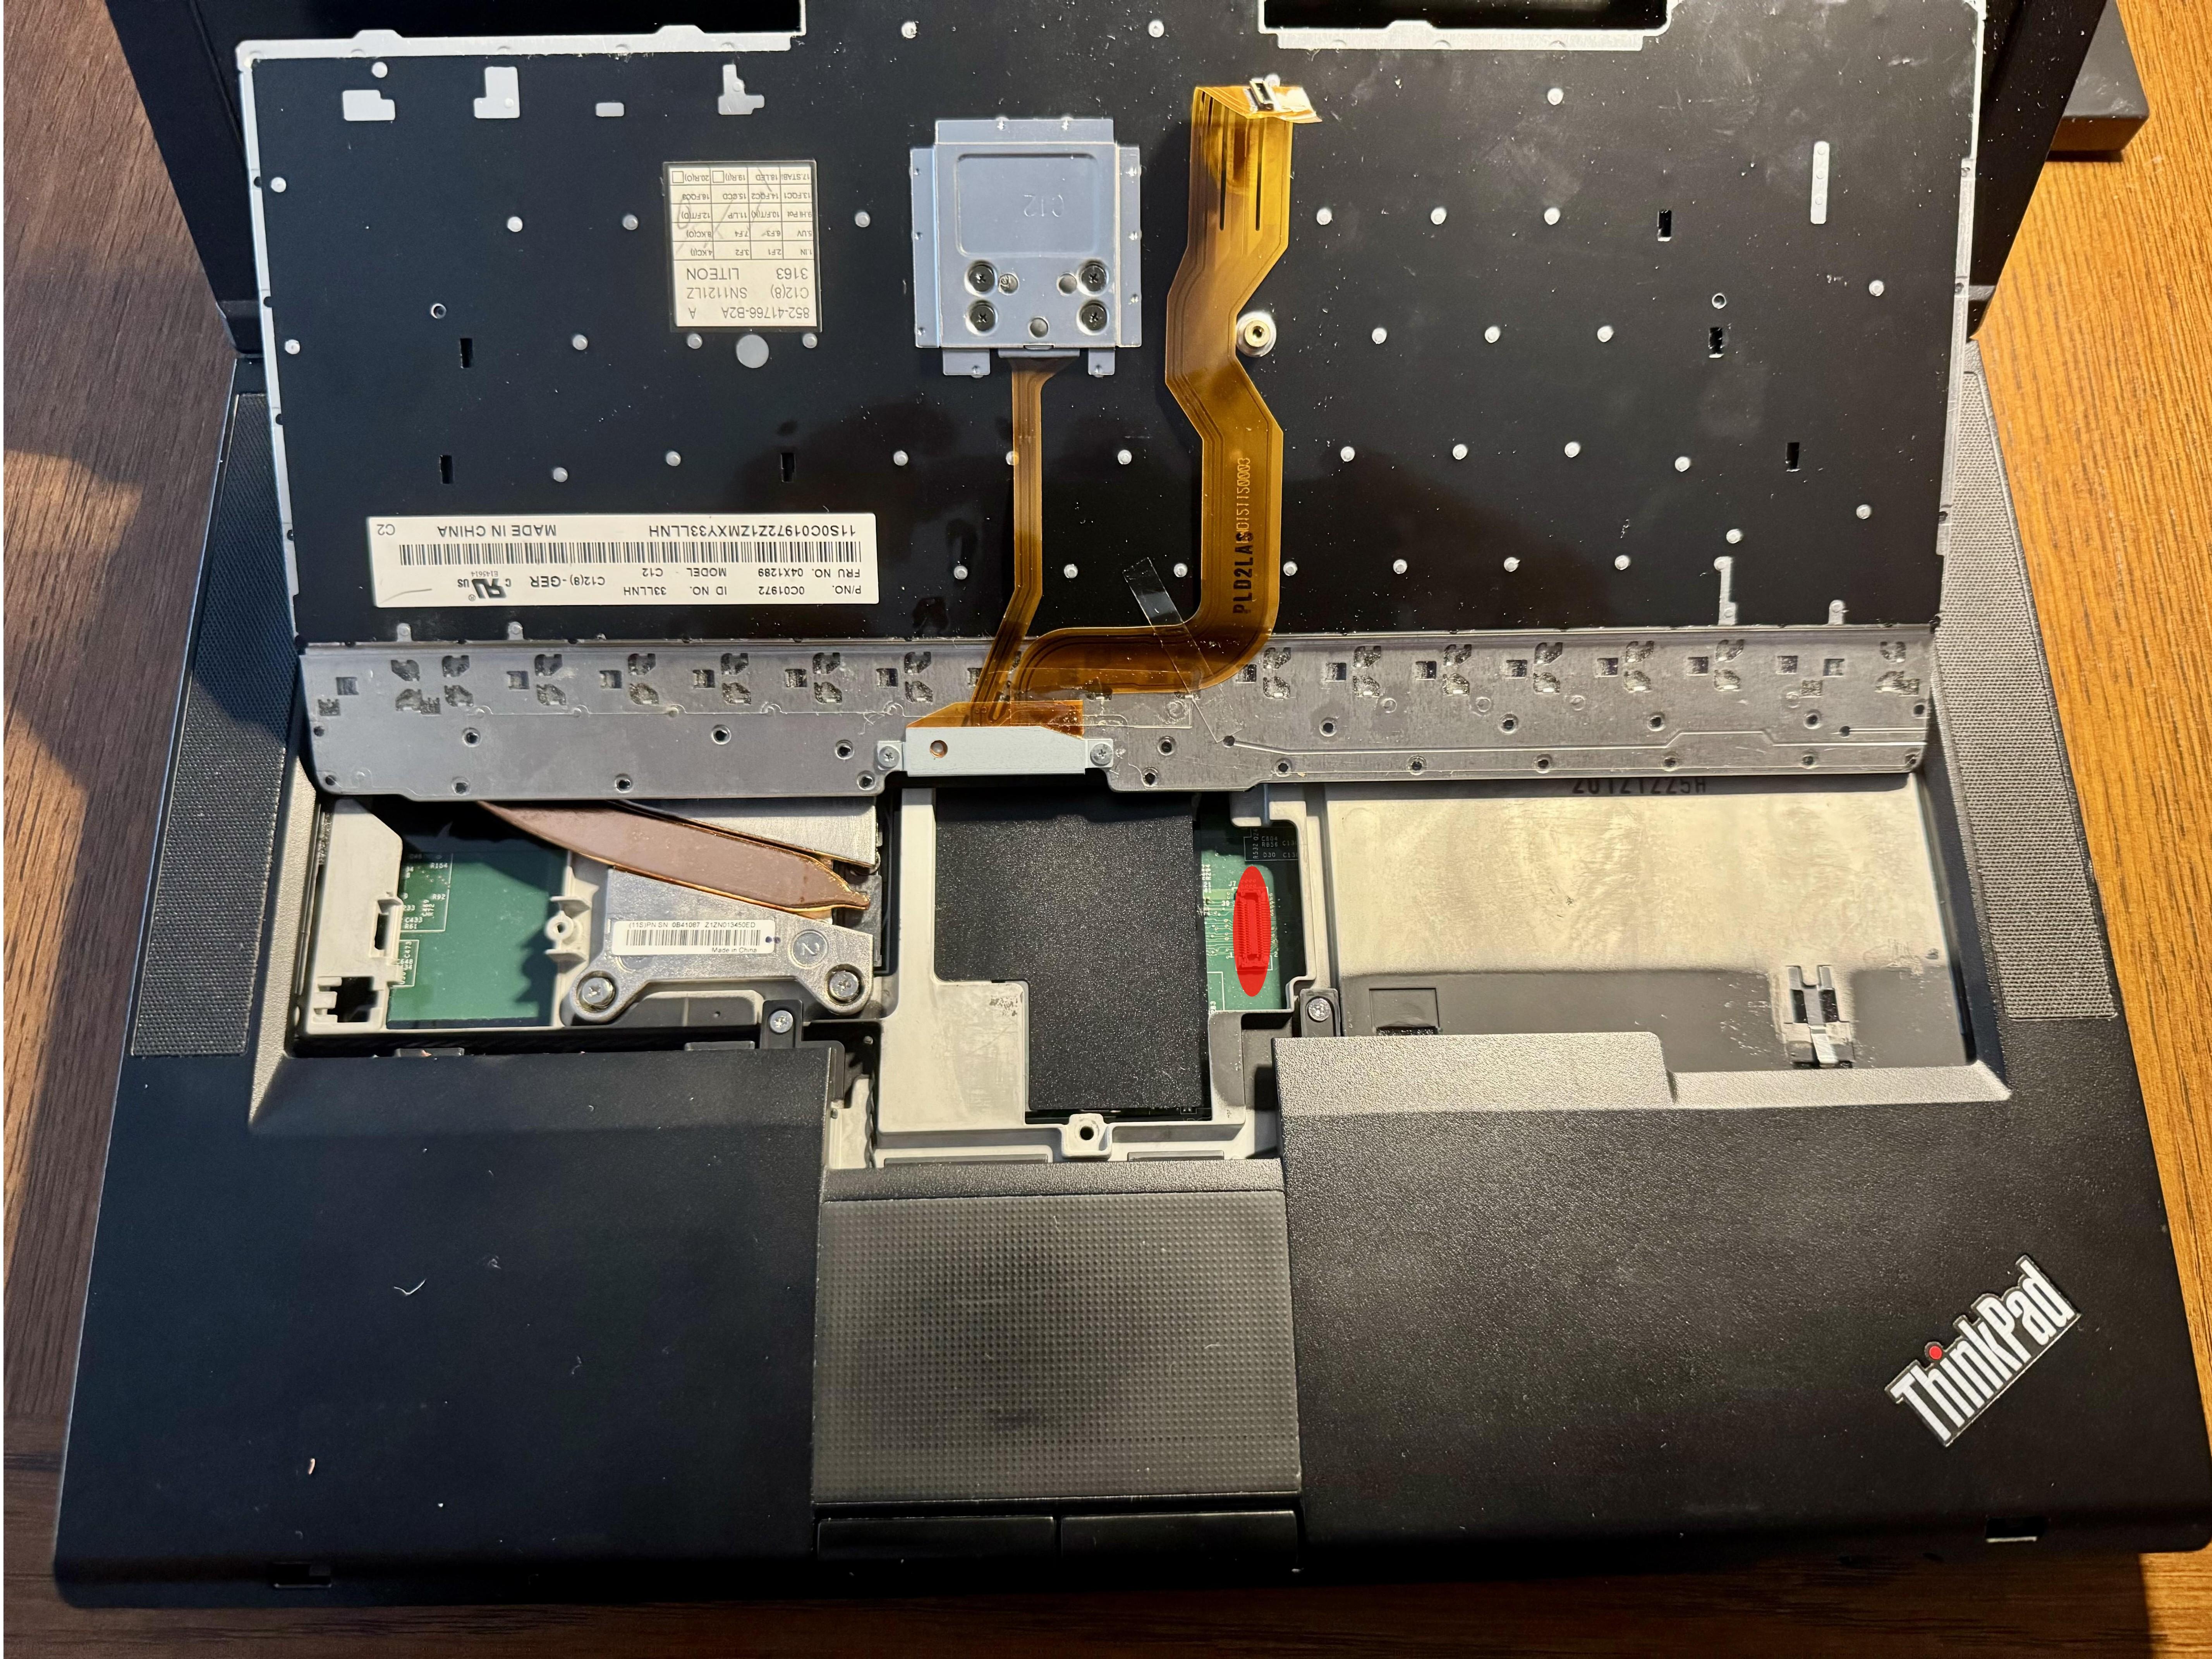
 The keyboard is connected to the motherboard by a ribbon cable which easily detaches from the motherboard.
Remove these screws in order to remove the palm-rest.
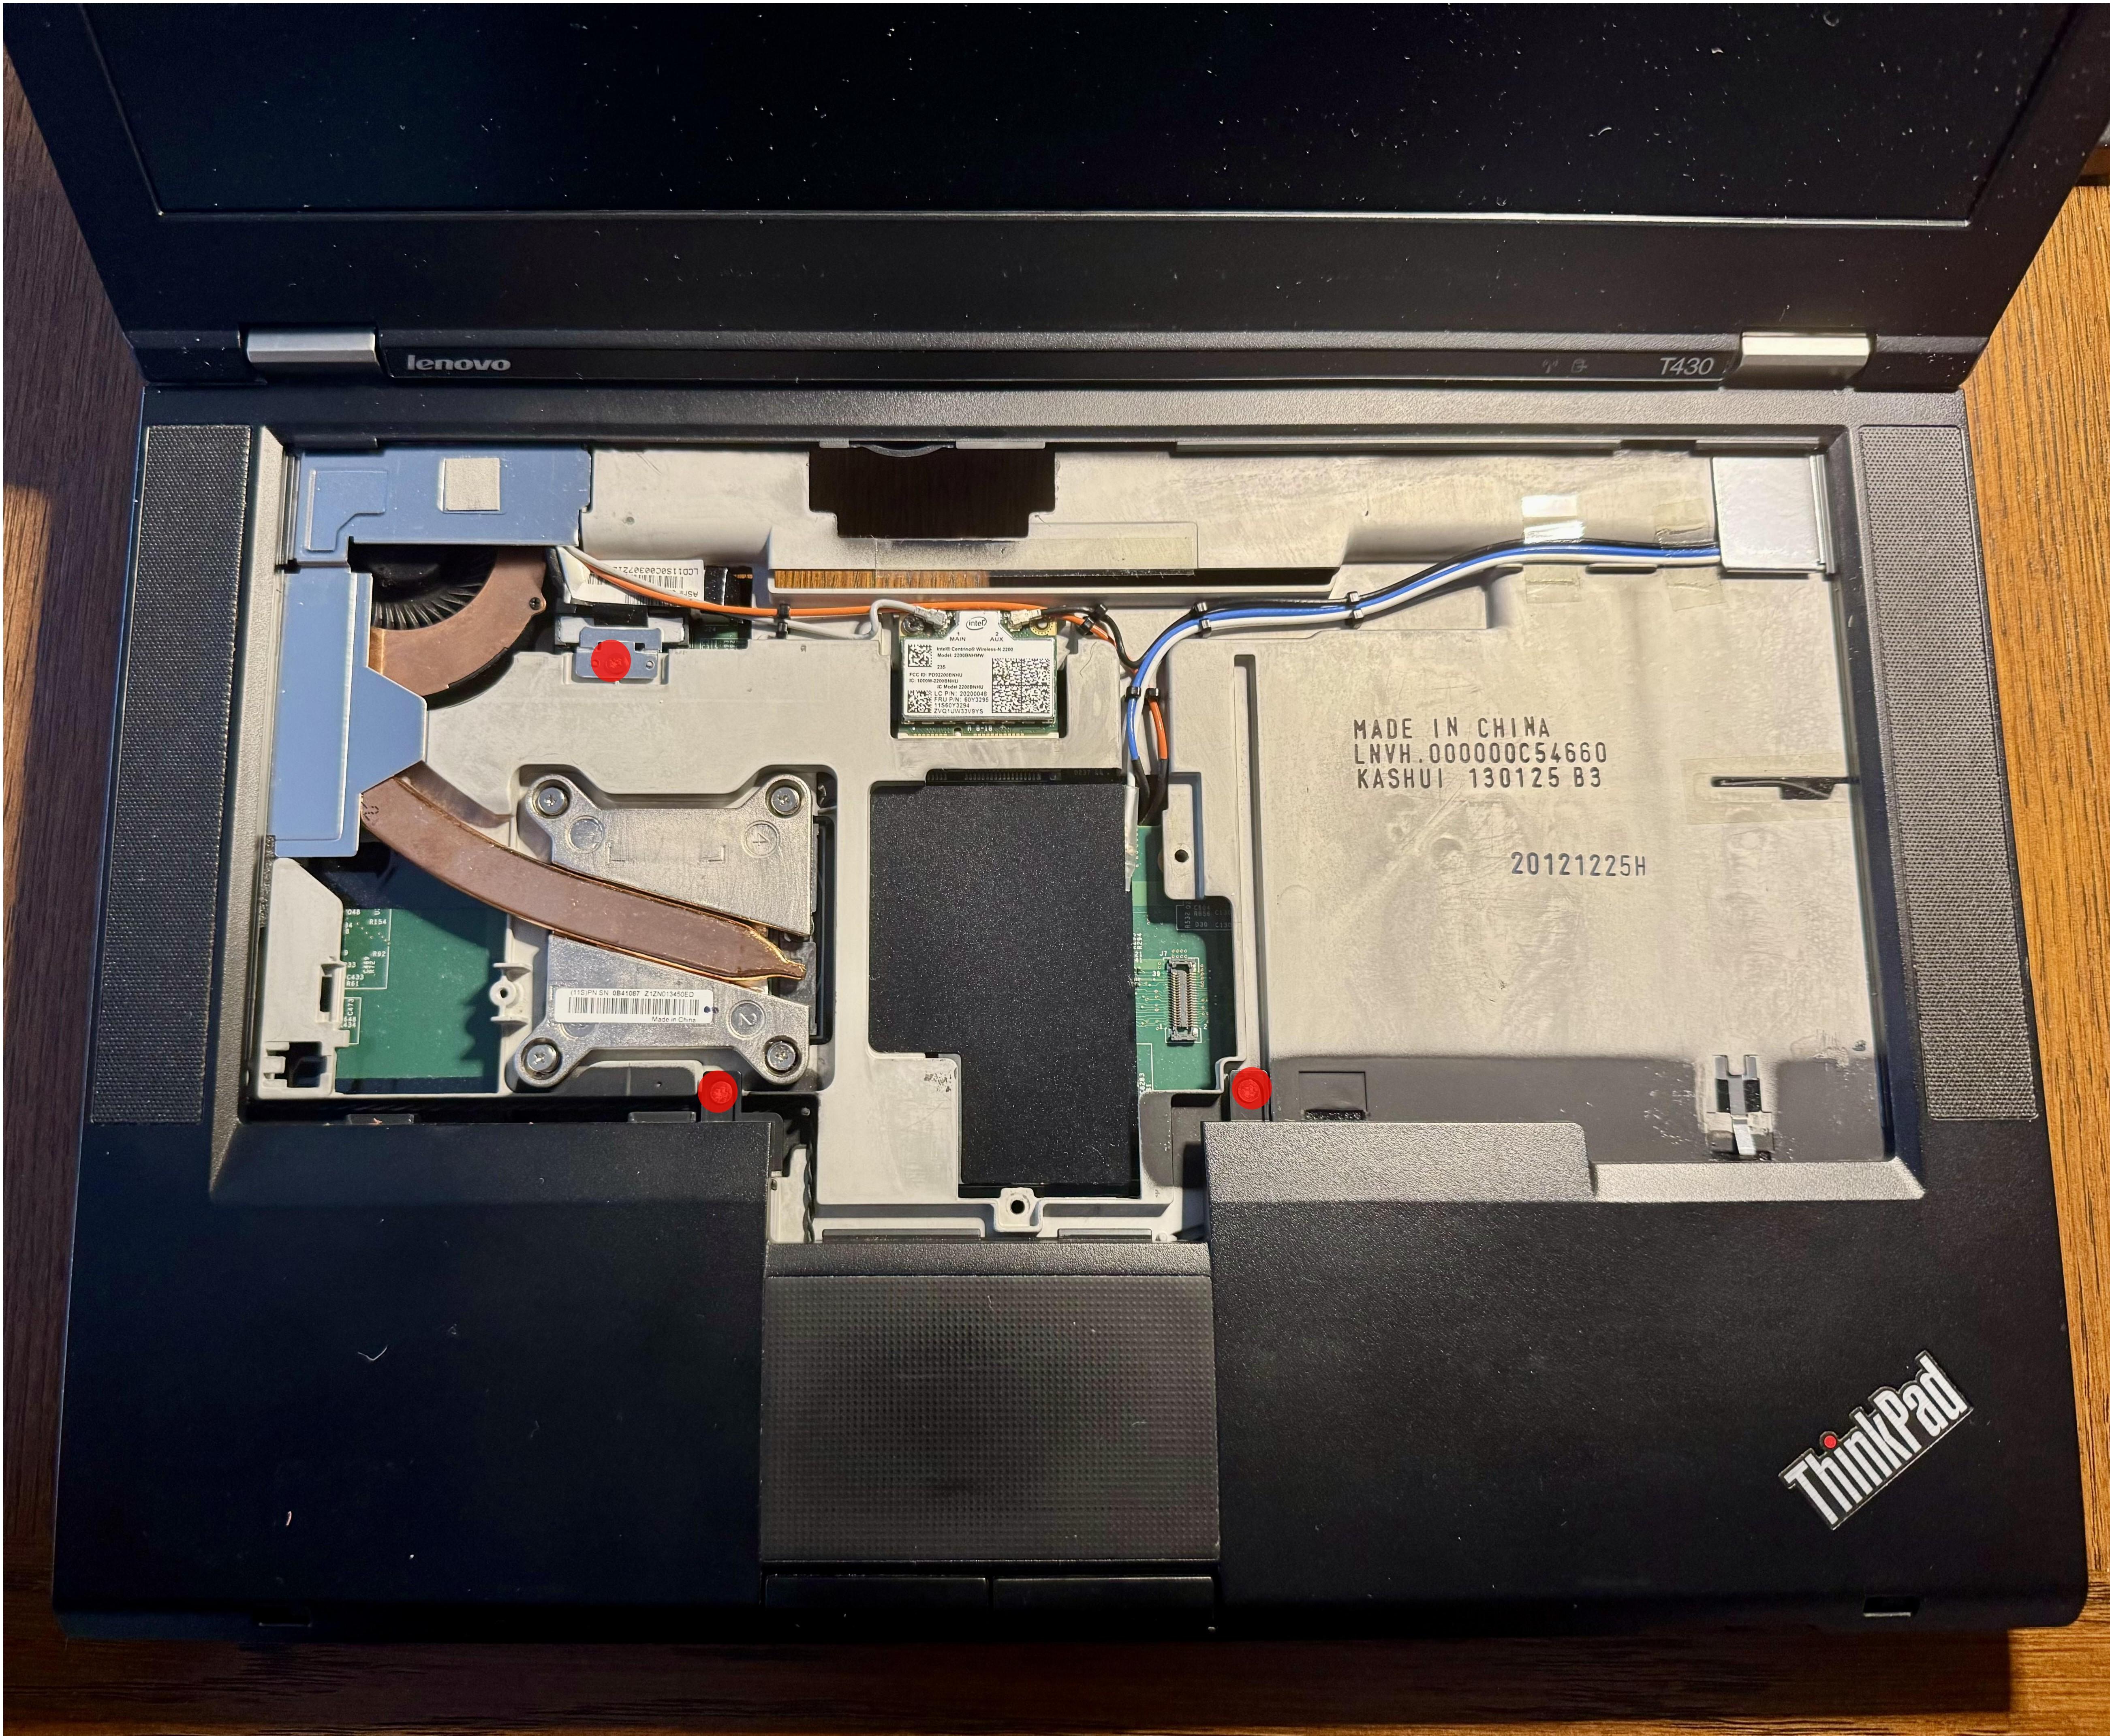
The palm-rest is removed. Removing these screws will allow you to further detach the screen and the CPU cooler.
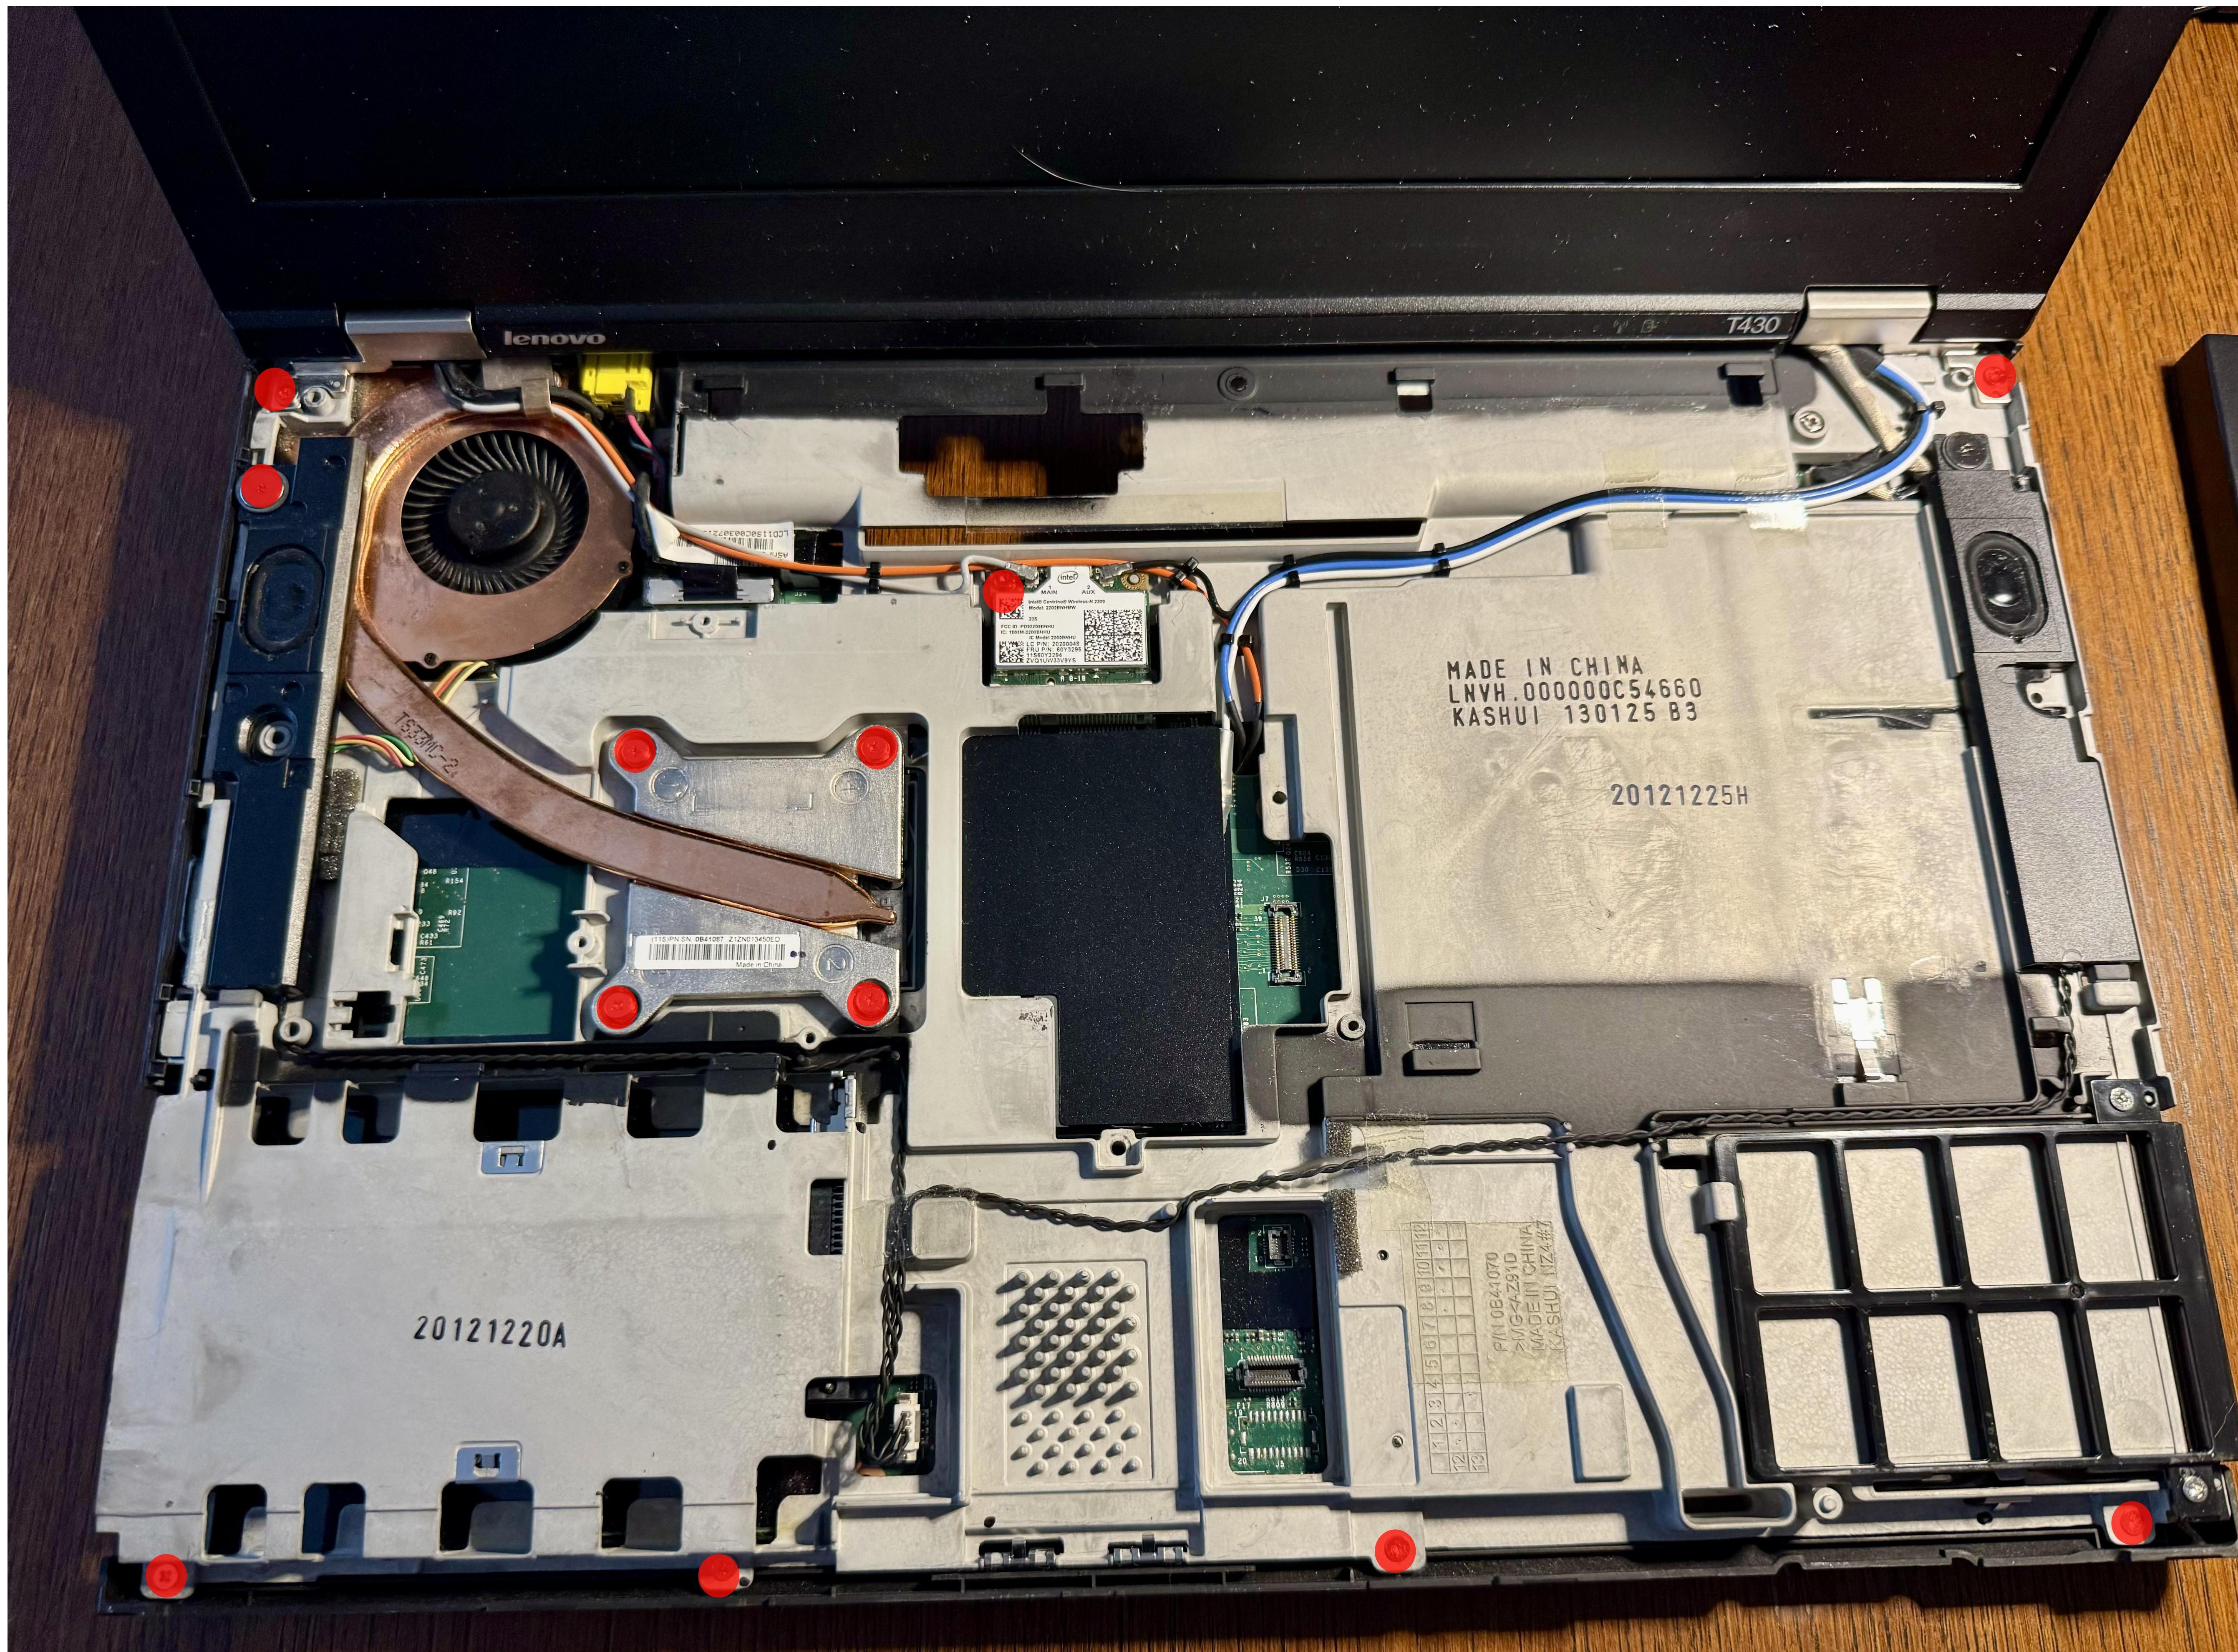
The screen and CPU with left speaker are removed.
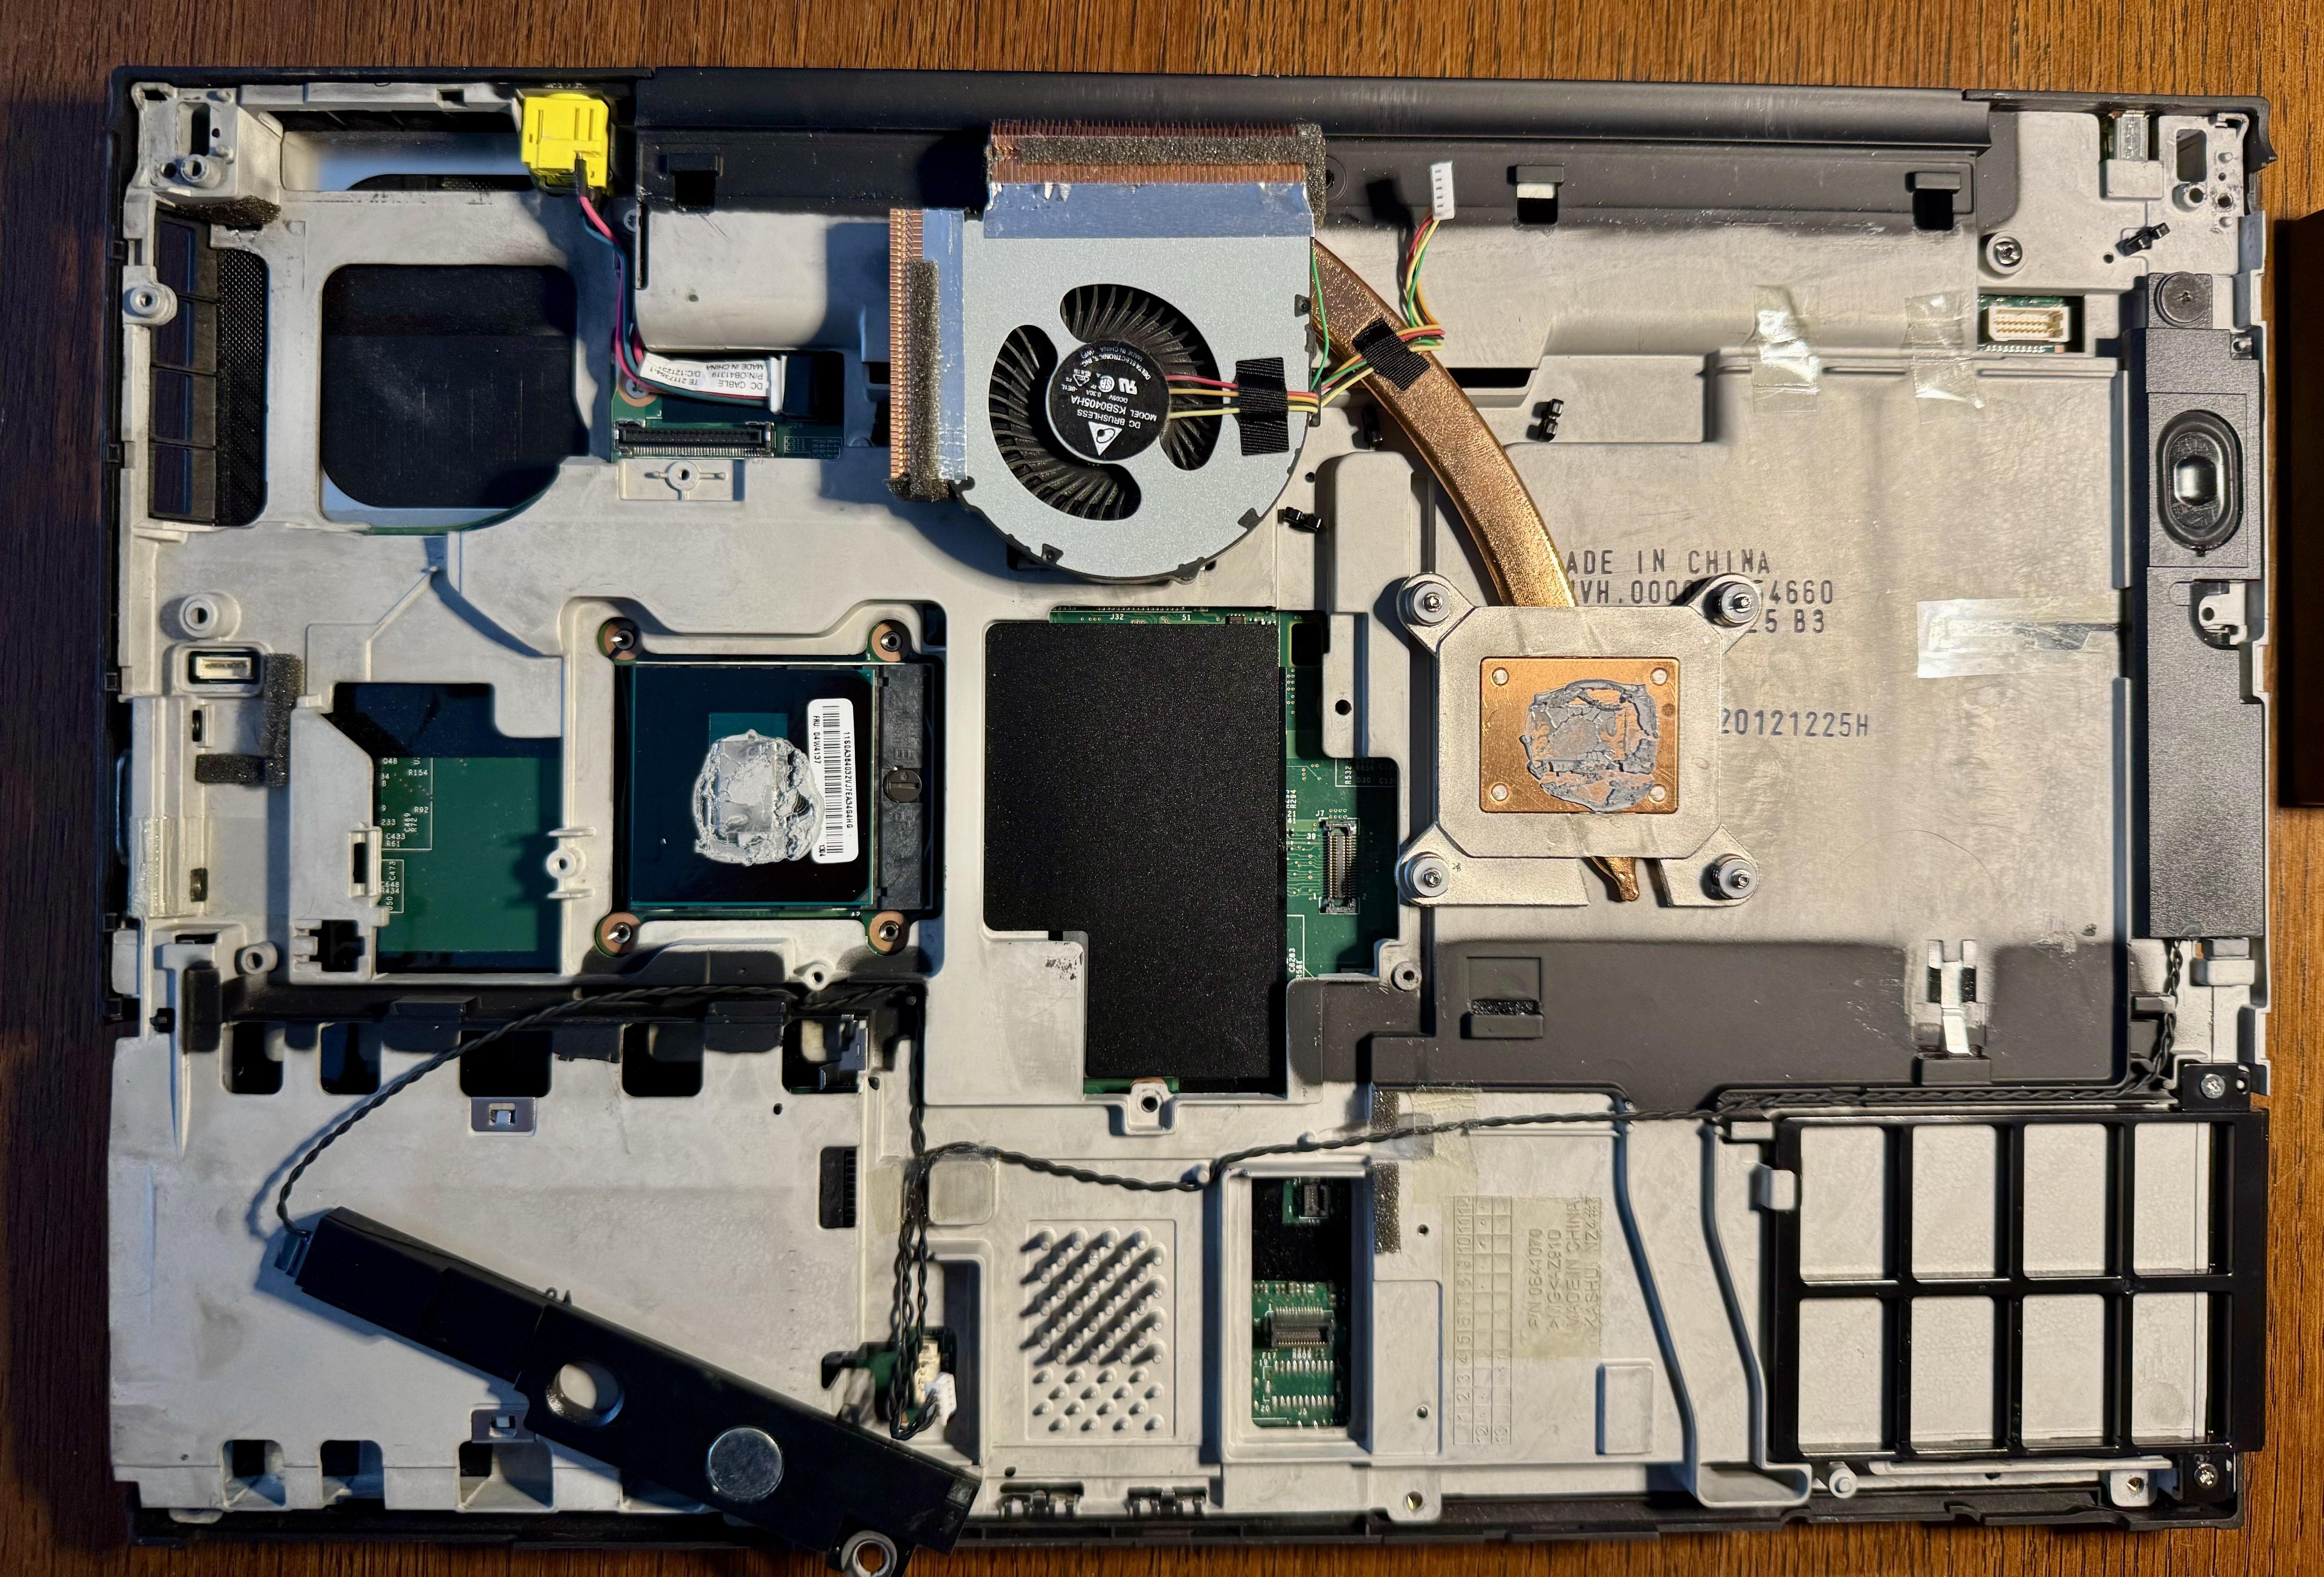
Flip the board and remove these screws too. This should allow you to get rid of the aluminium part to access the SPI flash chips.
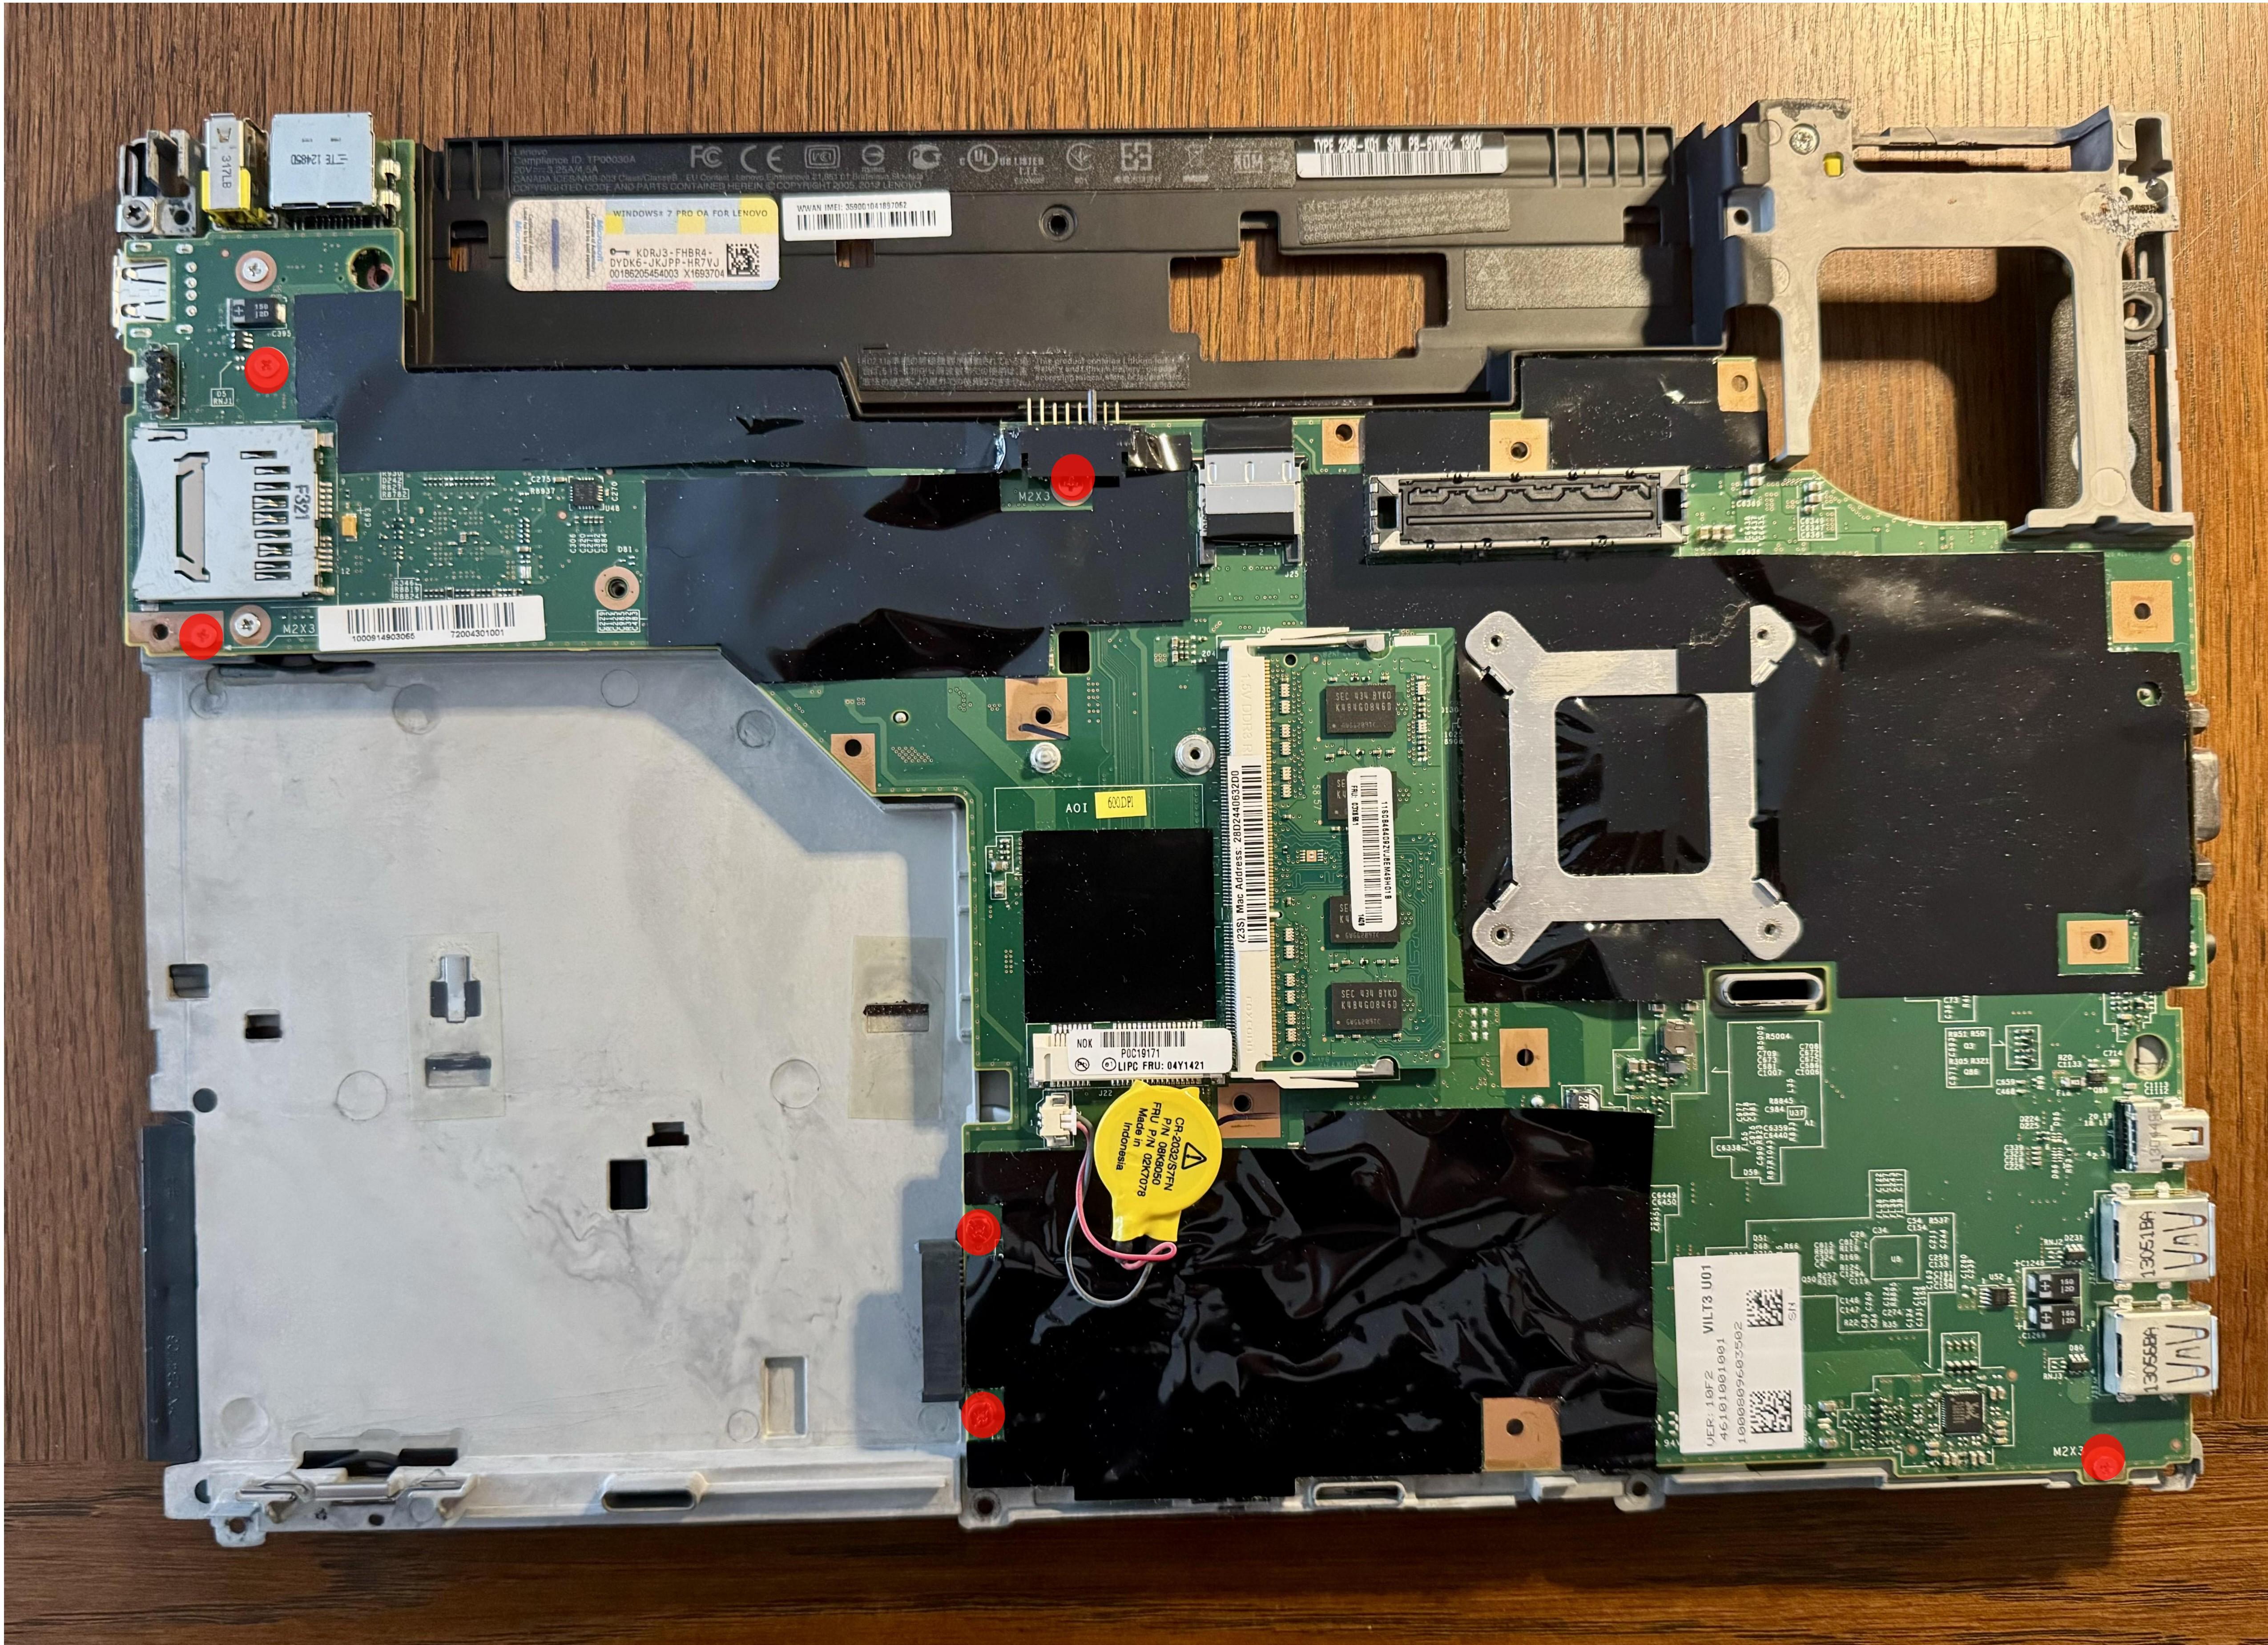
Flip the board again. The SPI flash chips are located under this plastic.
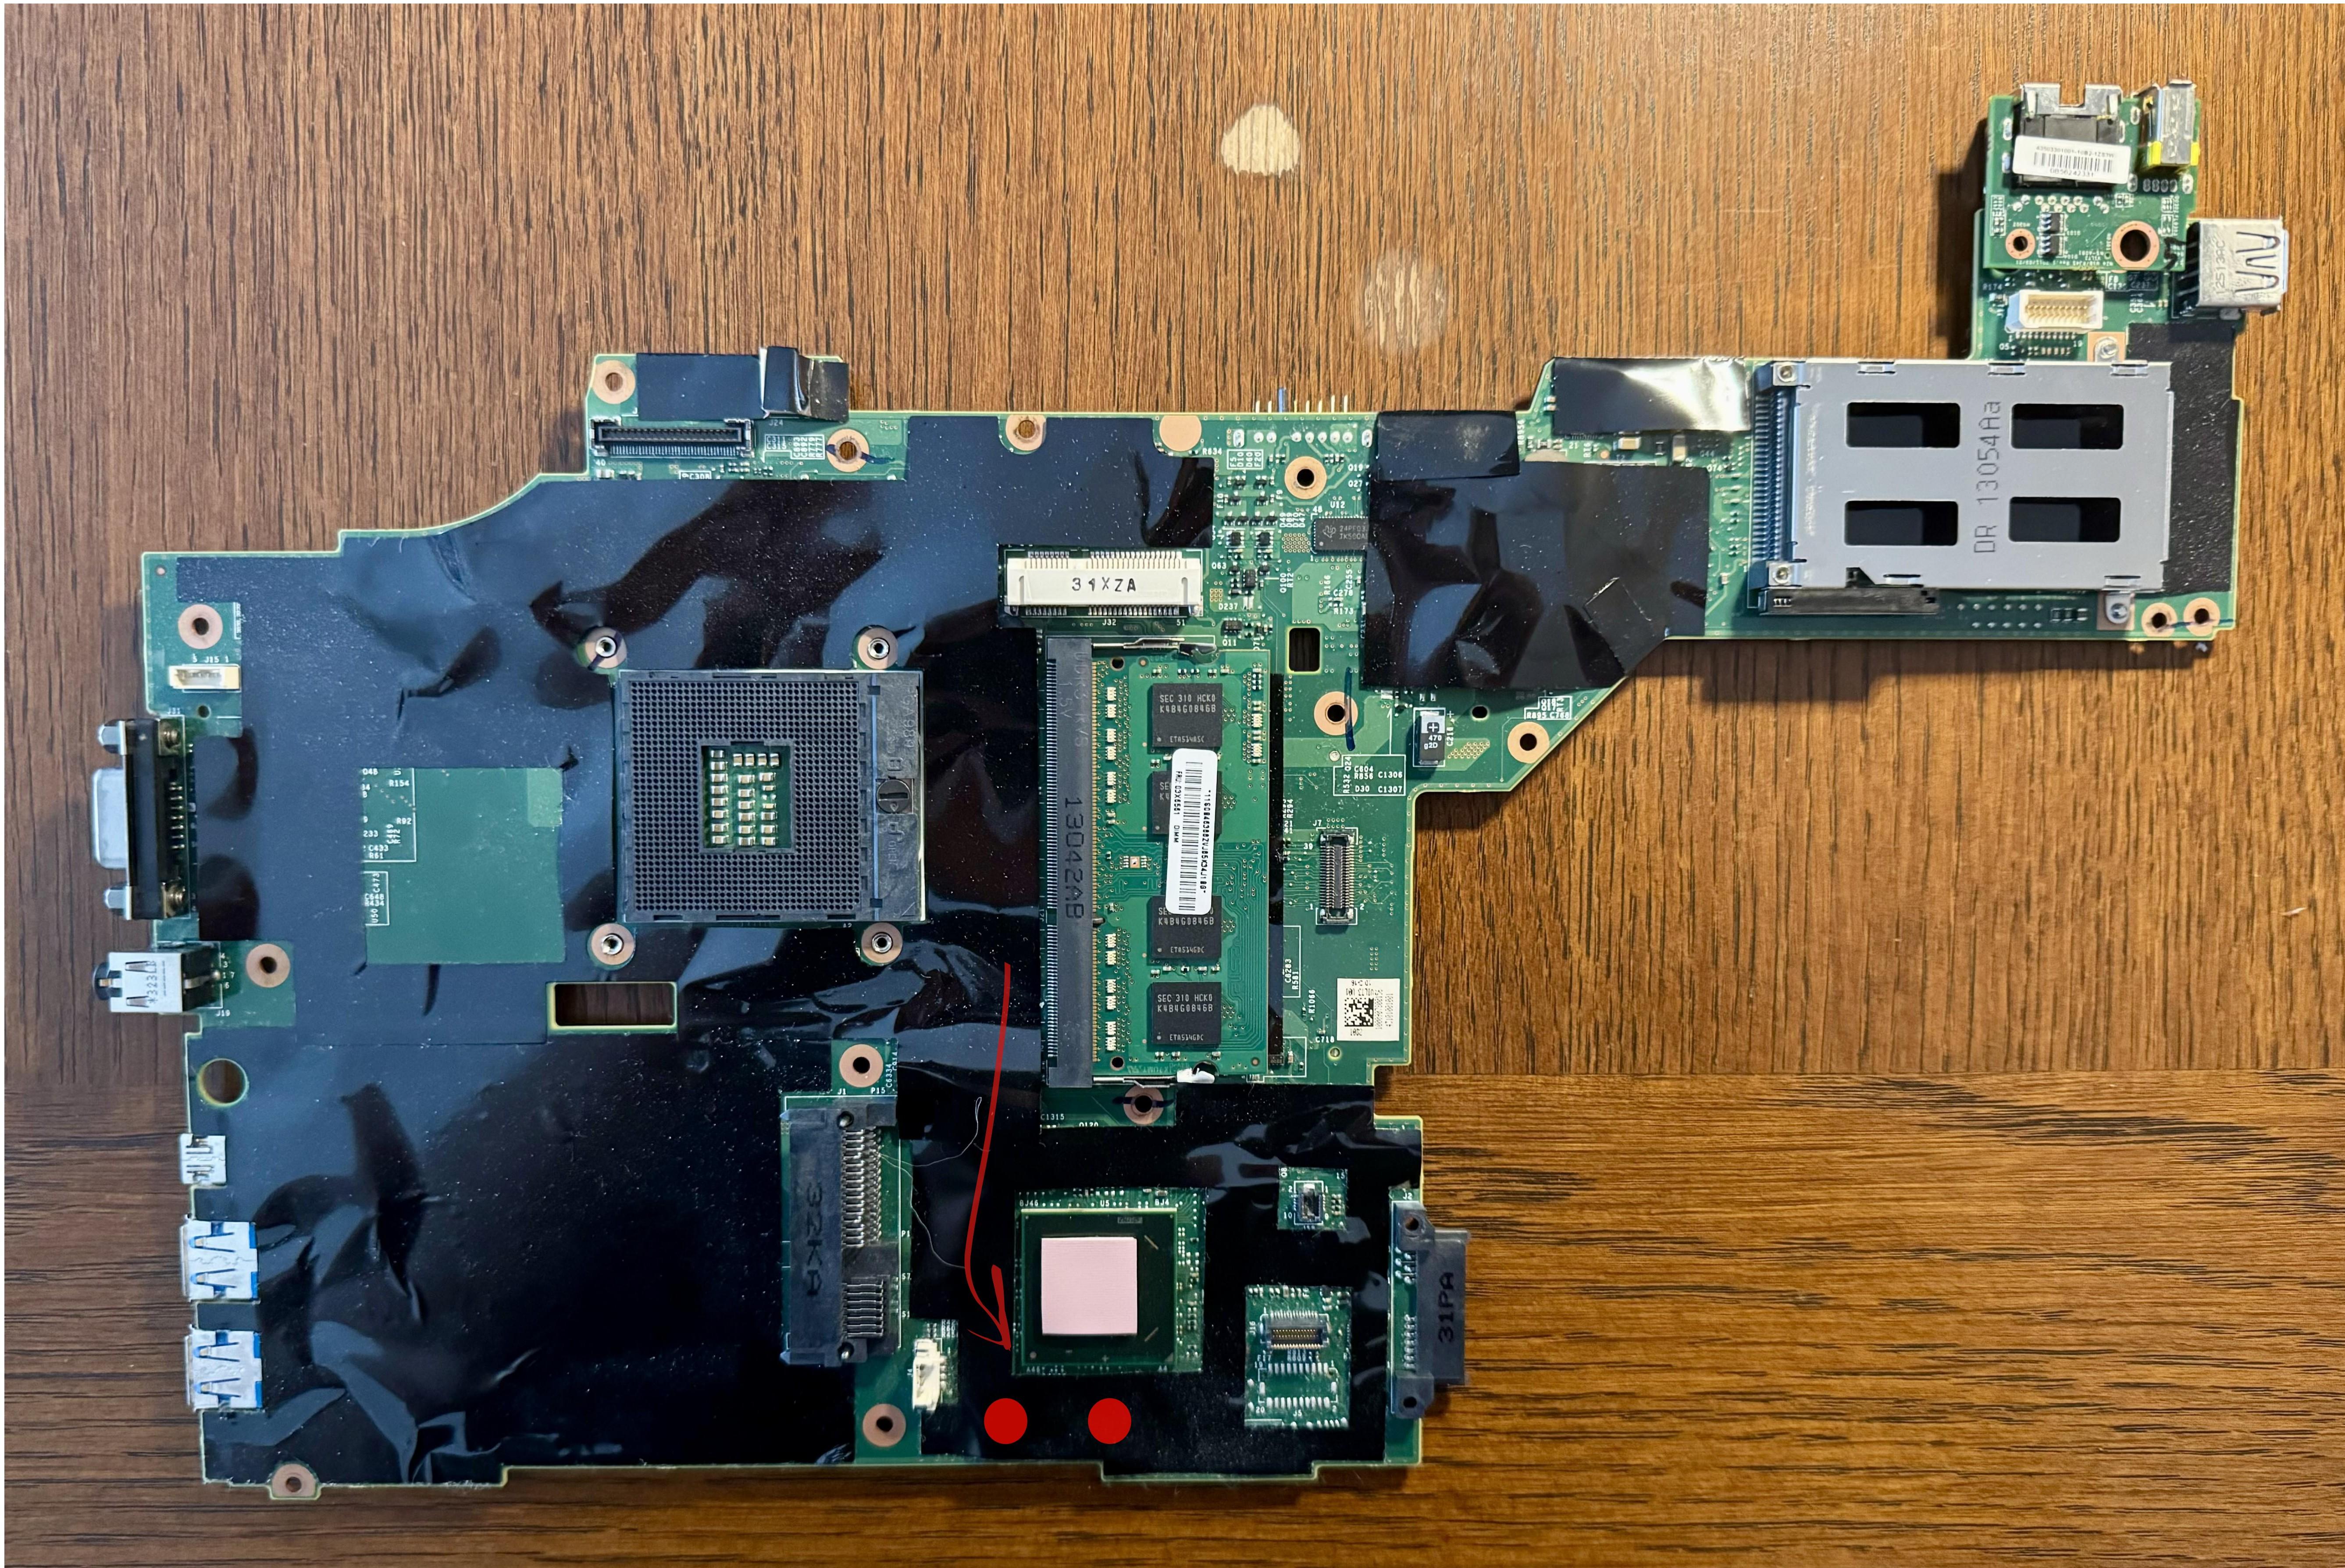
Left chip corresponds to the “bottom” flash chip (8192 kb) and right corresponds to the “top” (4096 kb) chip, respectively. The top chip is 4MB and contains the BIOS and reset vector. The bottom chip is 8MB and has the Intel Management Engine (ME) firmware, plus the flash descriptor. To be on the safe side, you may want to disconnect CMOS battery before next steps.
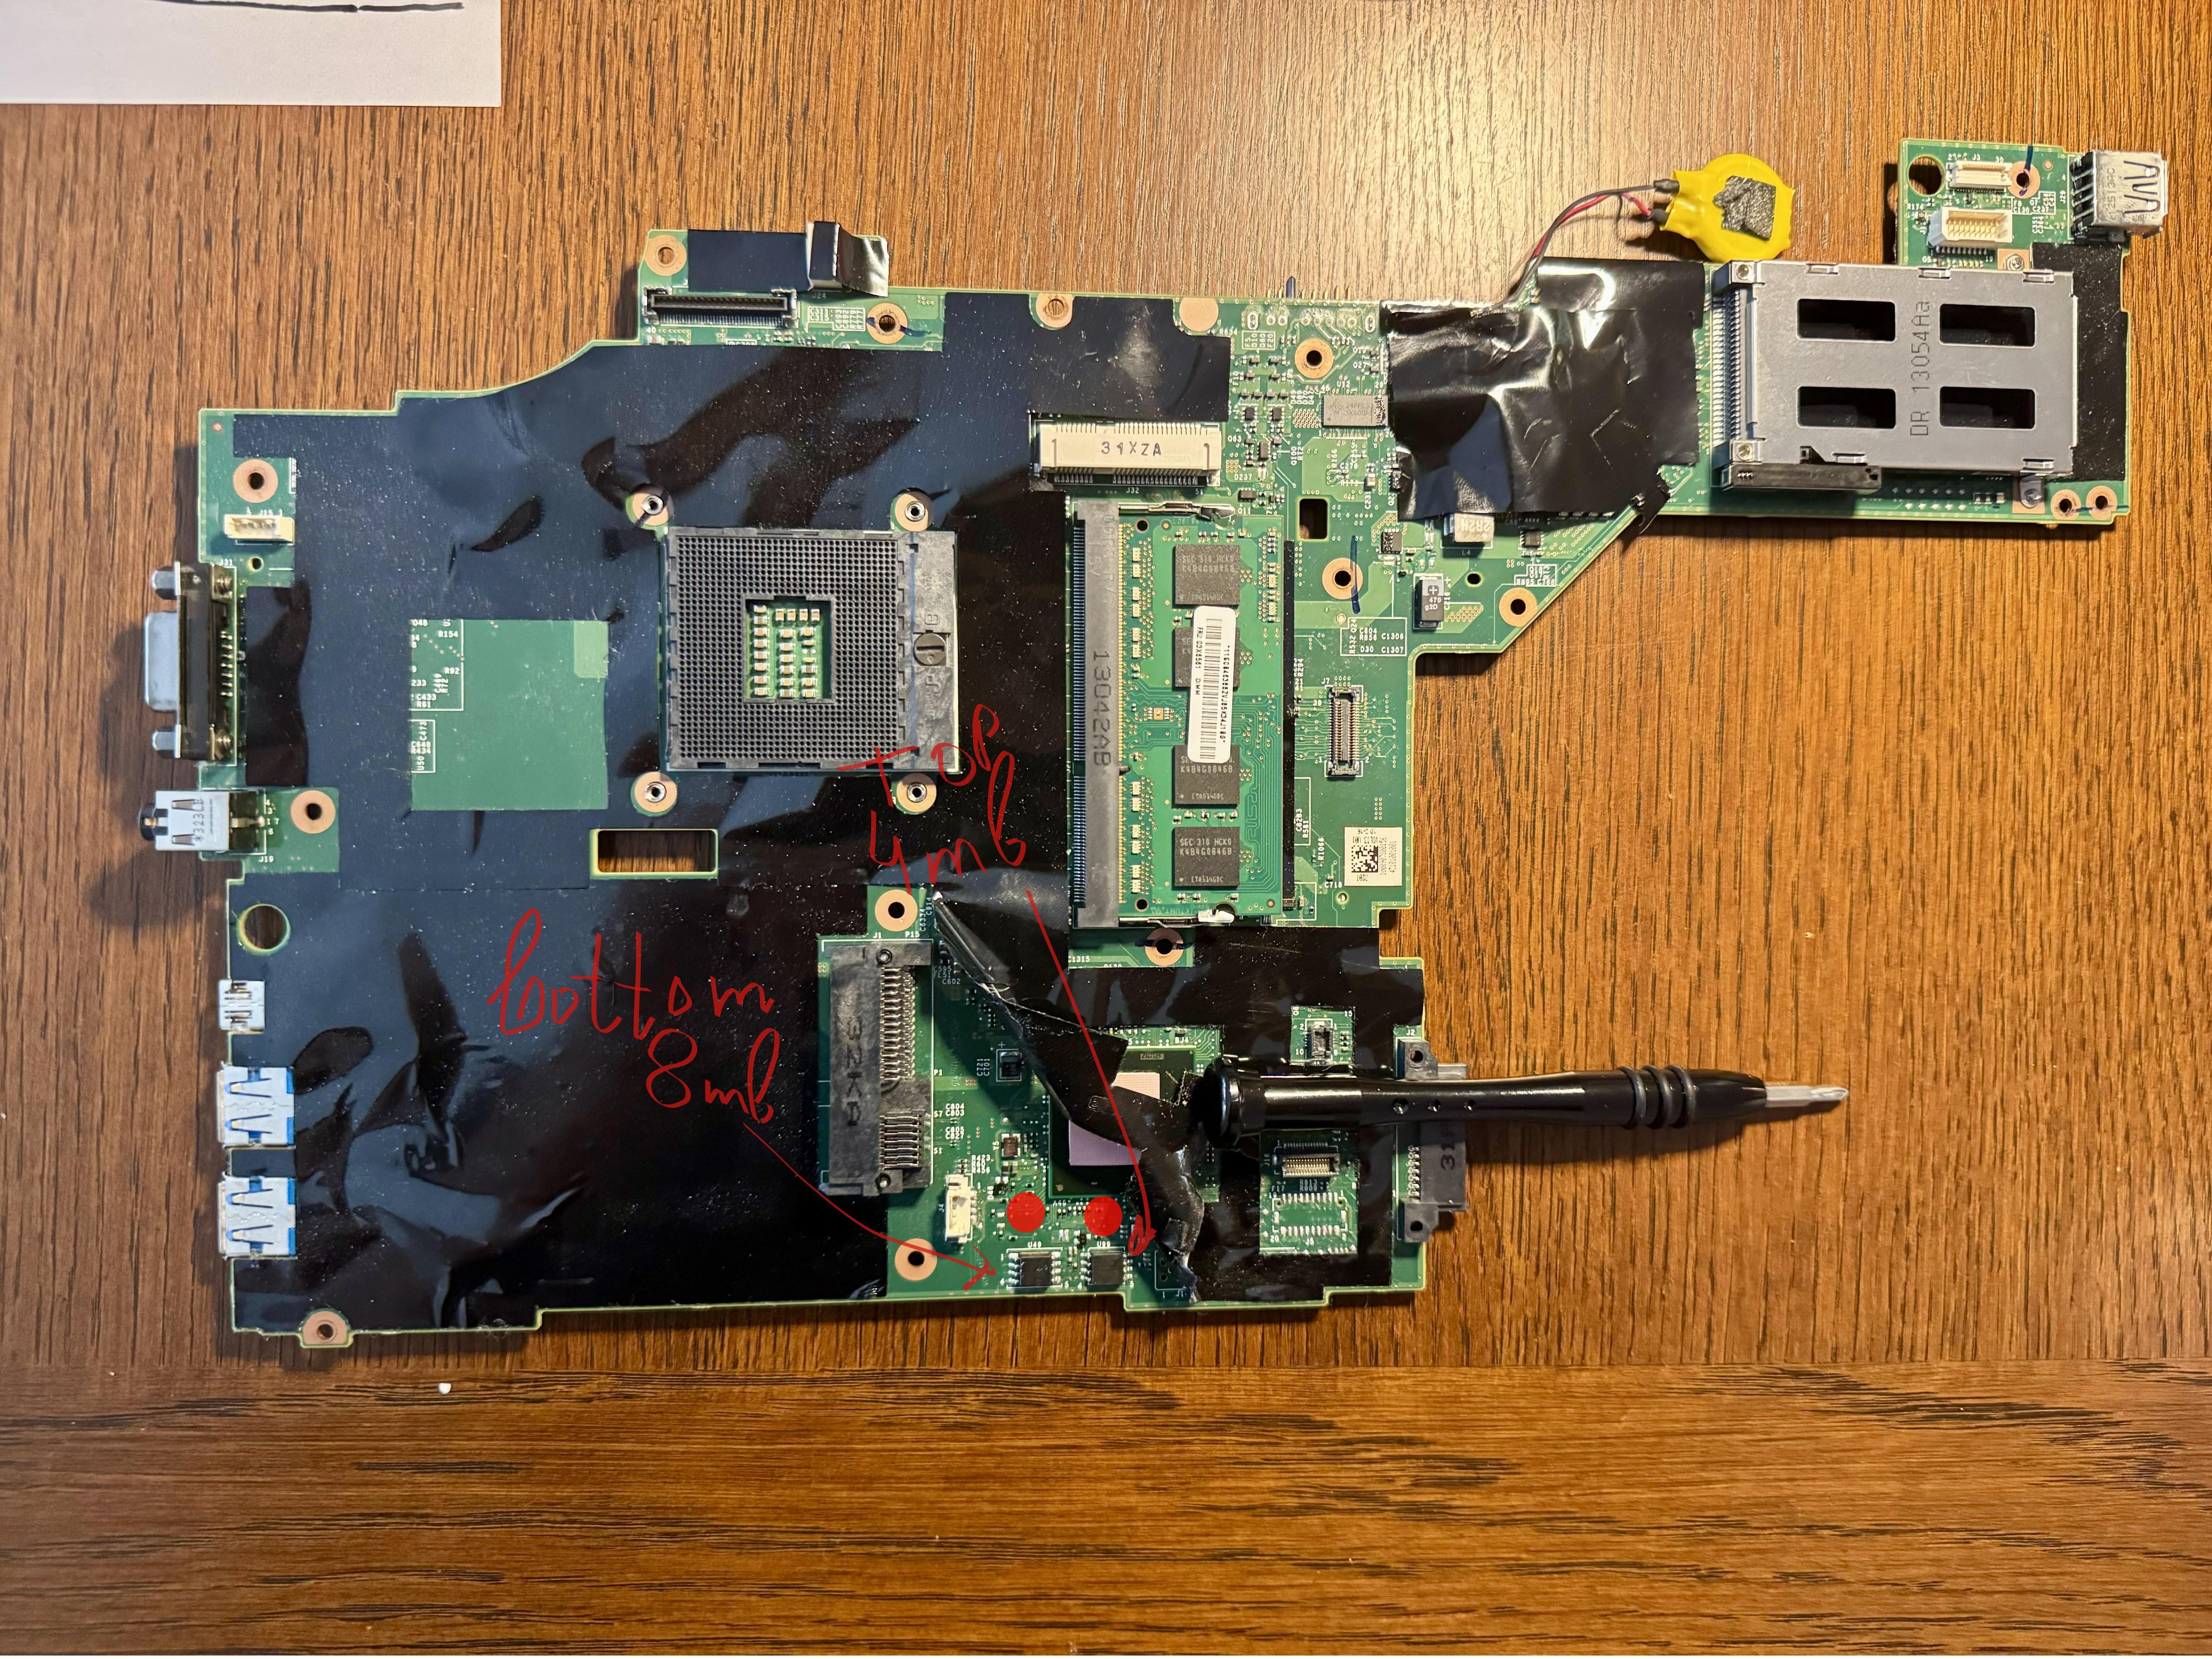
First download or build (please see general building / building x230) the maximized board roms (top and bottom) for this board and verify their hashes.
Try to read the name on the top SPI flash chip. I was unable to do that. The dots on the chip help to identify the correct clip orientation.
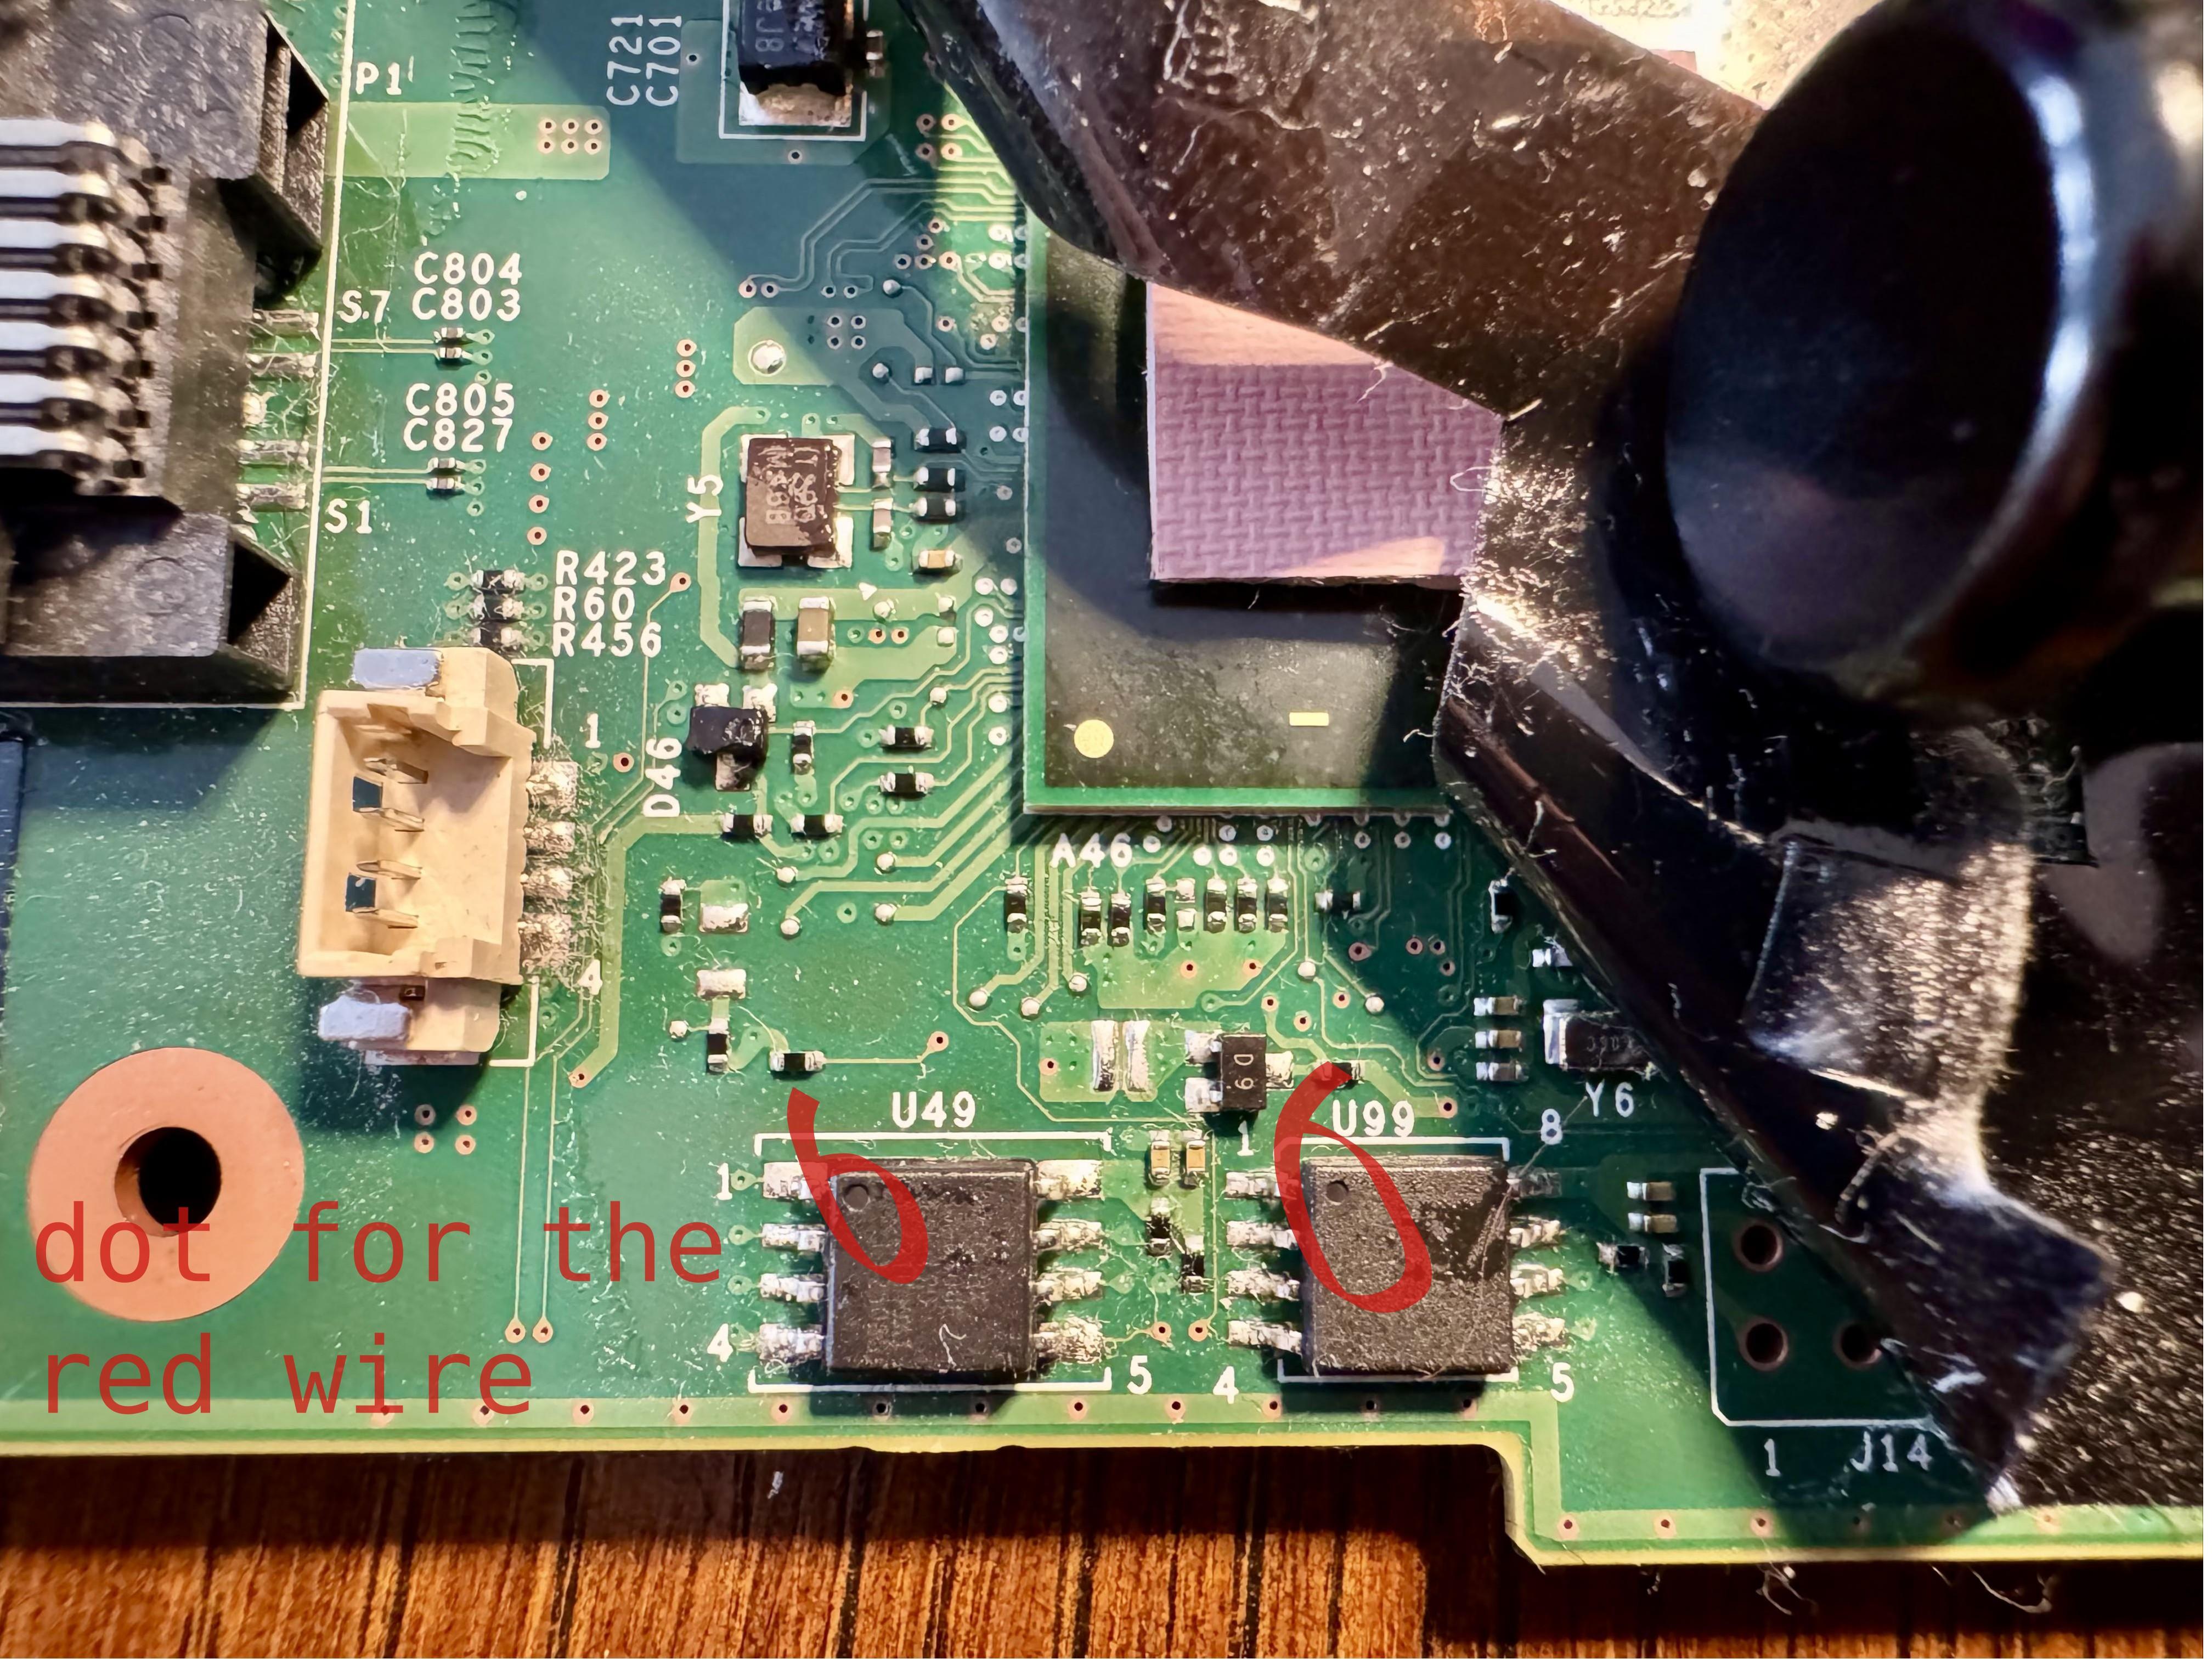
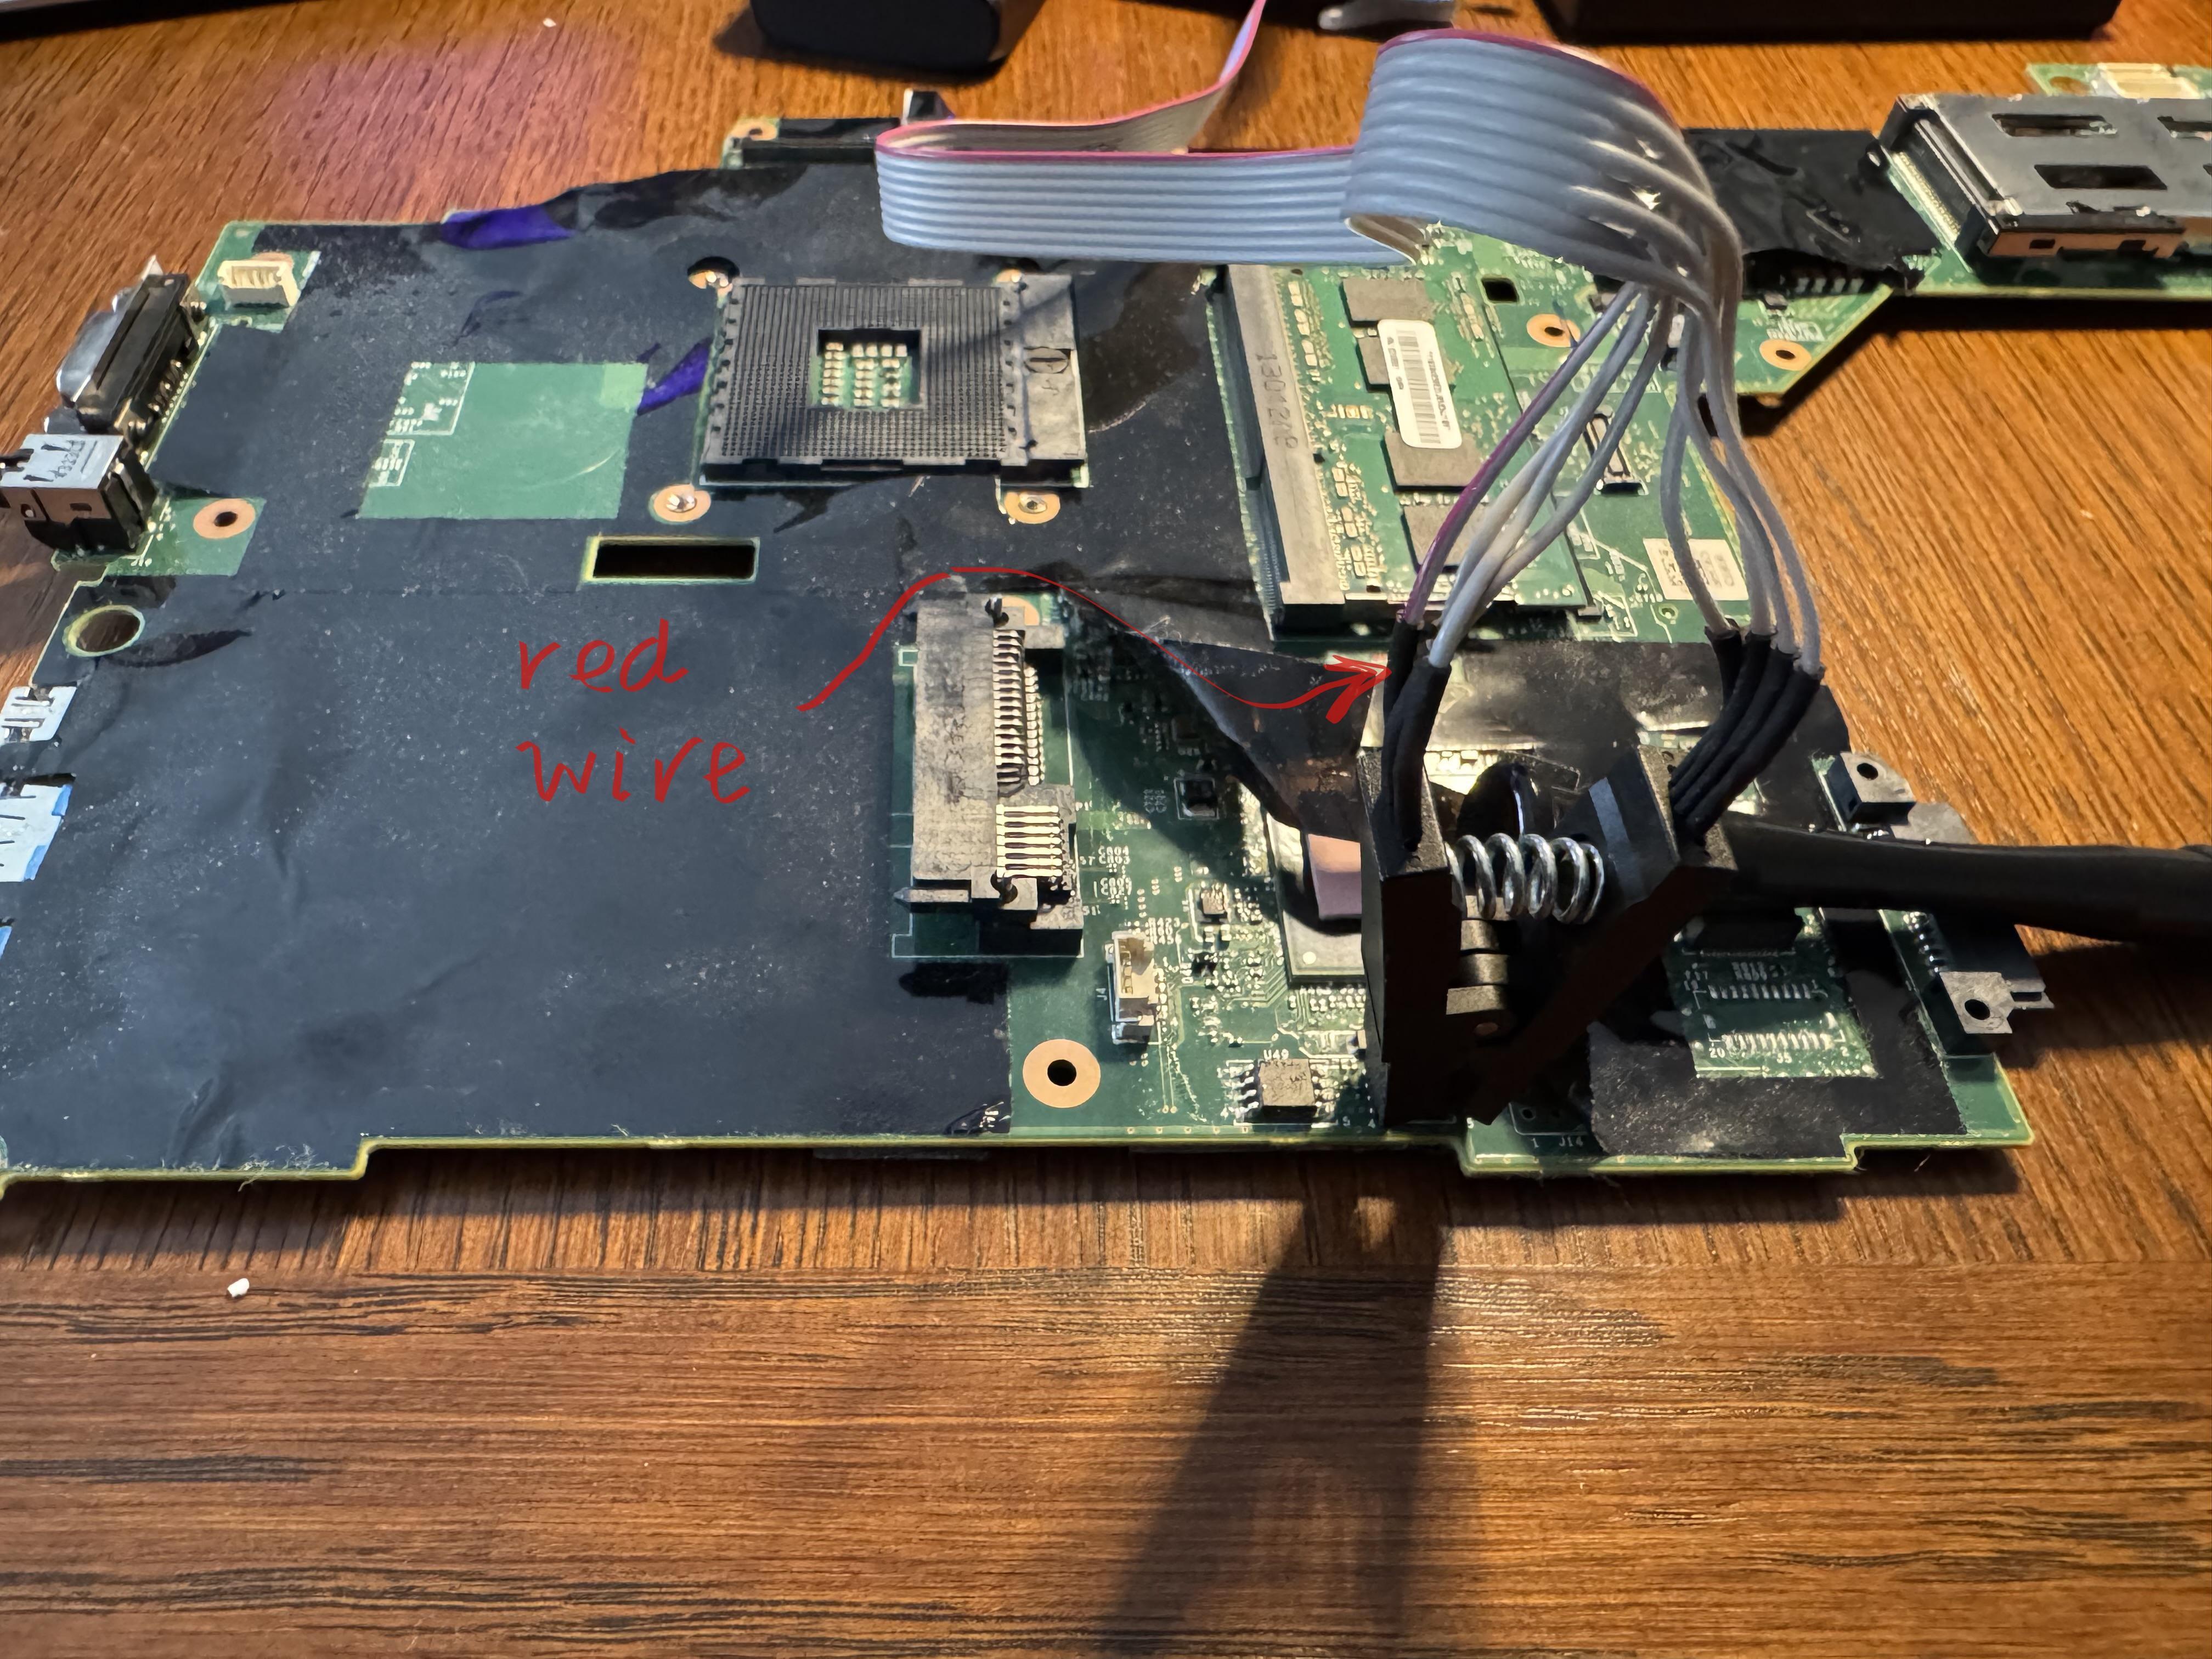
Then, connect the clip and ch341a programmer to the “top” (4096 kb) SPI flash chip. In my set up, the red wire should be where the dot is.
Flashing
Use [flasher] of your choice (flashrom or flashprog – see Tool Interchangeability) with the programmer you selected ([programmer] – see Programmer Selection):
sudo [flasher] --programmer [programmer]
Here is my output.
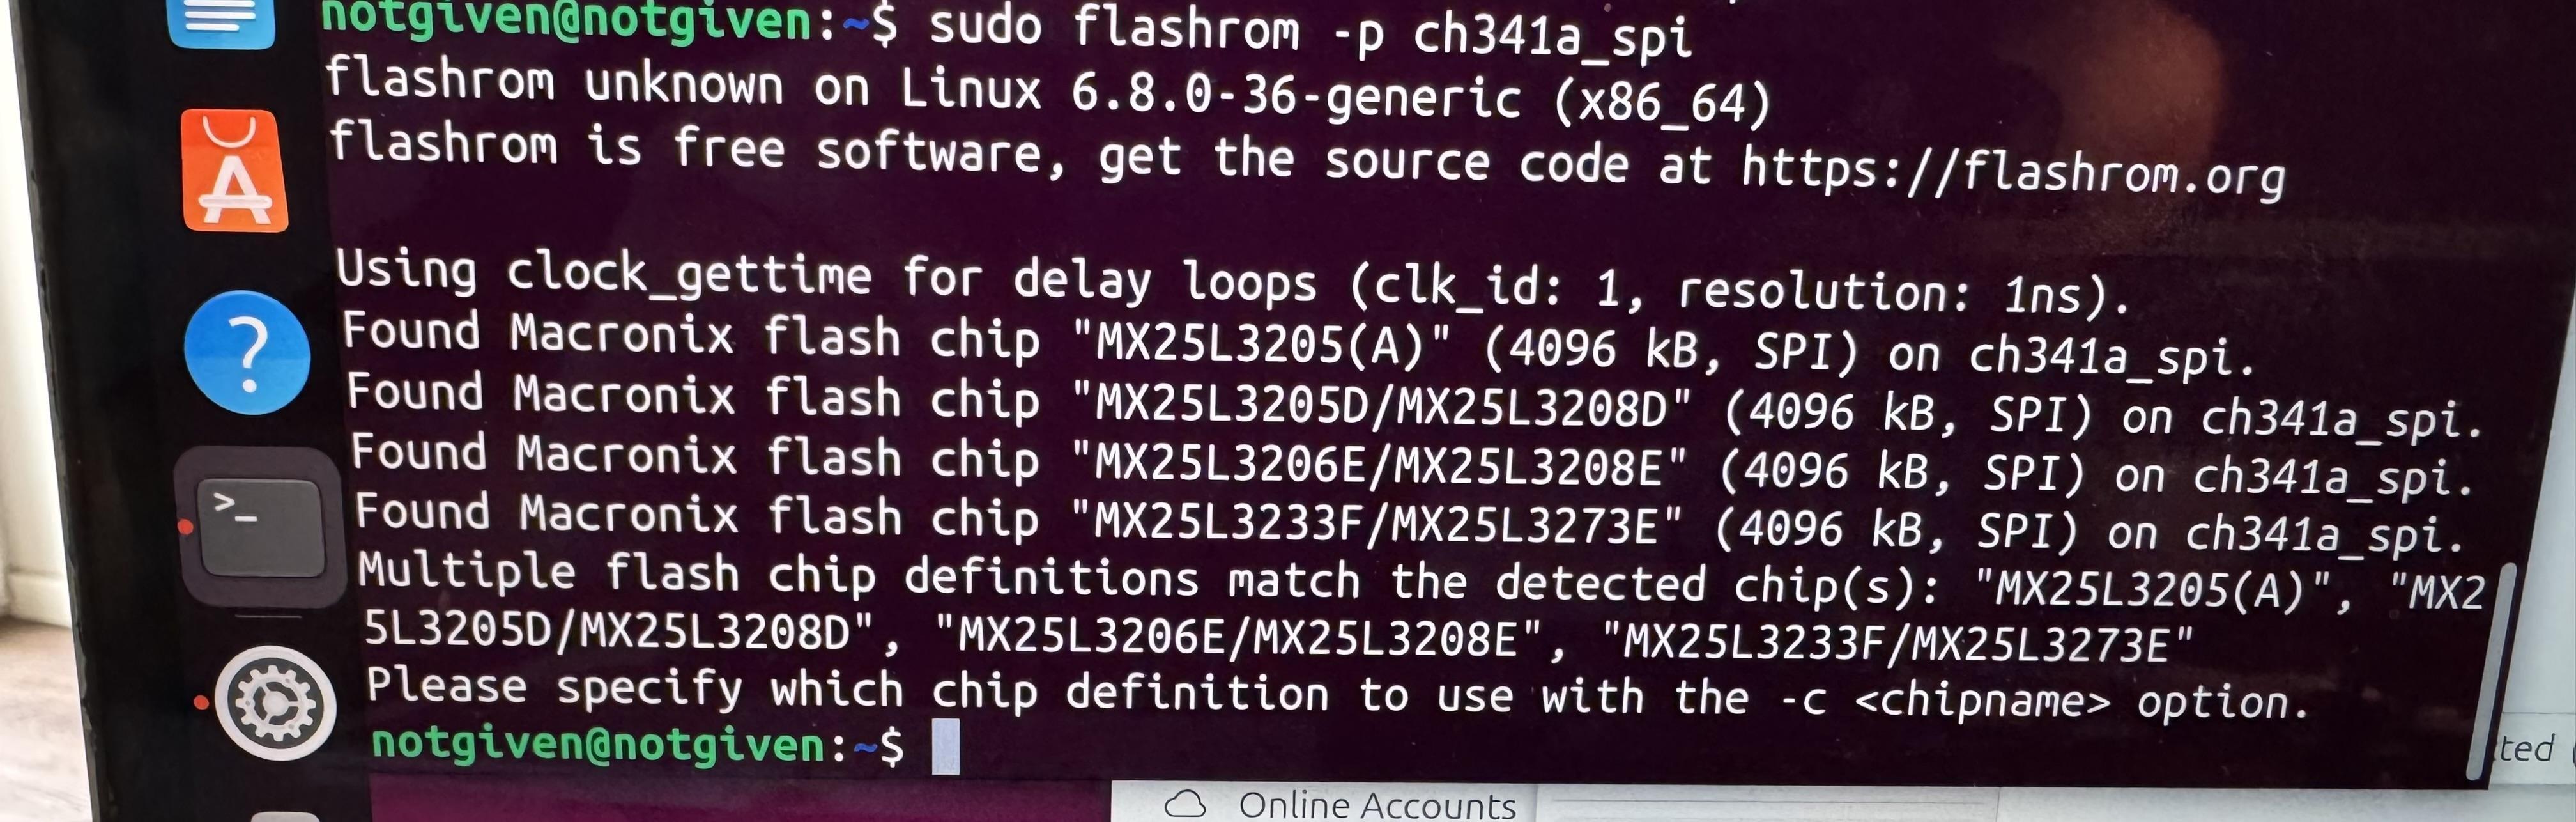
Find the chip and create a backup and verify it (For me the SPI flash chip is YYY):
sudo [flasher] --read ~/top.bin --programmer [programmer] --chip YYY && \
    sudo [flasher] --verify ~/top.bin --programmer [programmer] --chip YYY
If the files differ then try reconnecting your programmer to the SPI flash chip and make sure your flashrom/flashprog software is up to date.
If they are the same then write t430-maximized-top.rom to the SPI flash chip:
sudo [flasher] --programmer [programmer] --chip YYY --write ~/heads/build/x86/t430-maximized/t430-maximized-top.rom
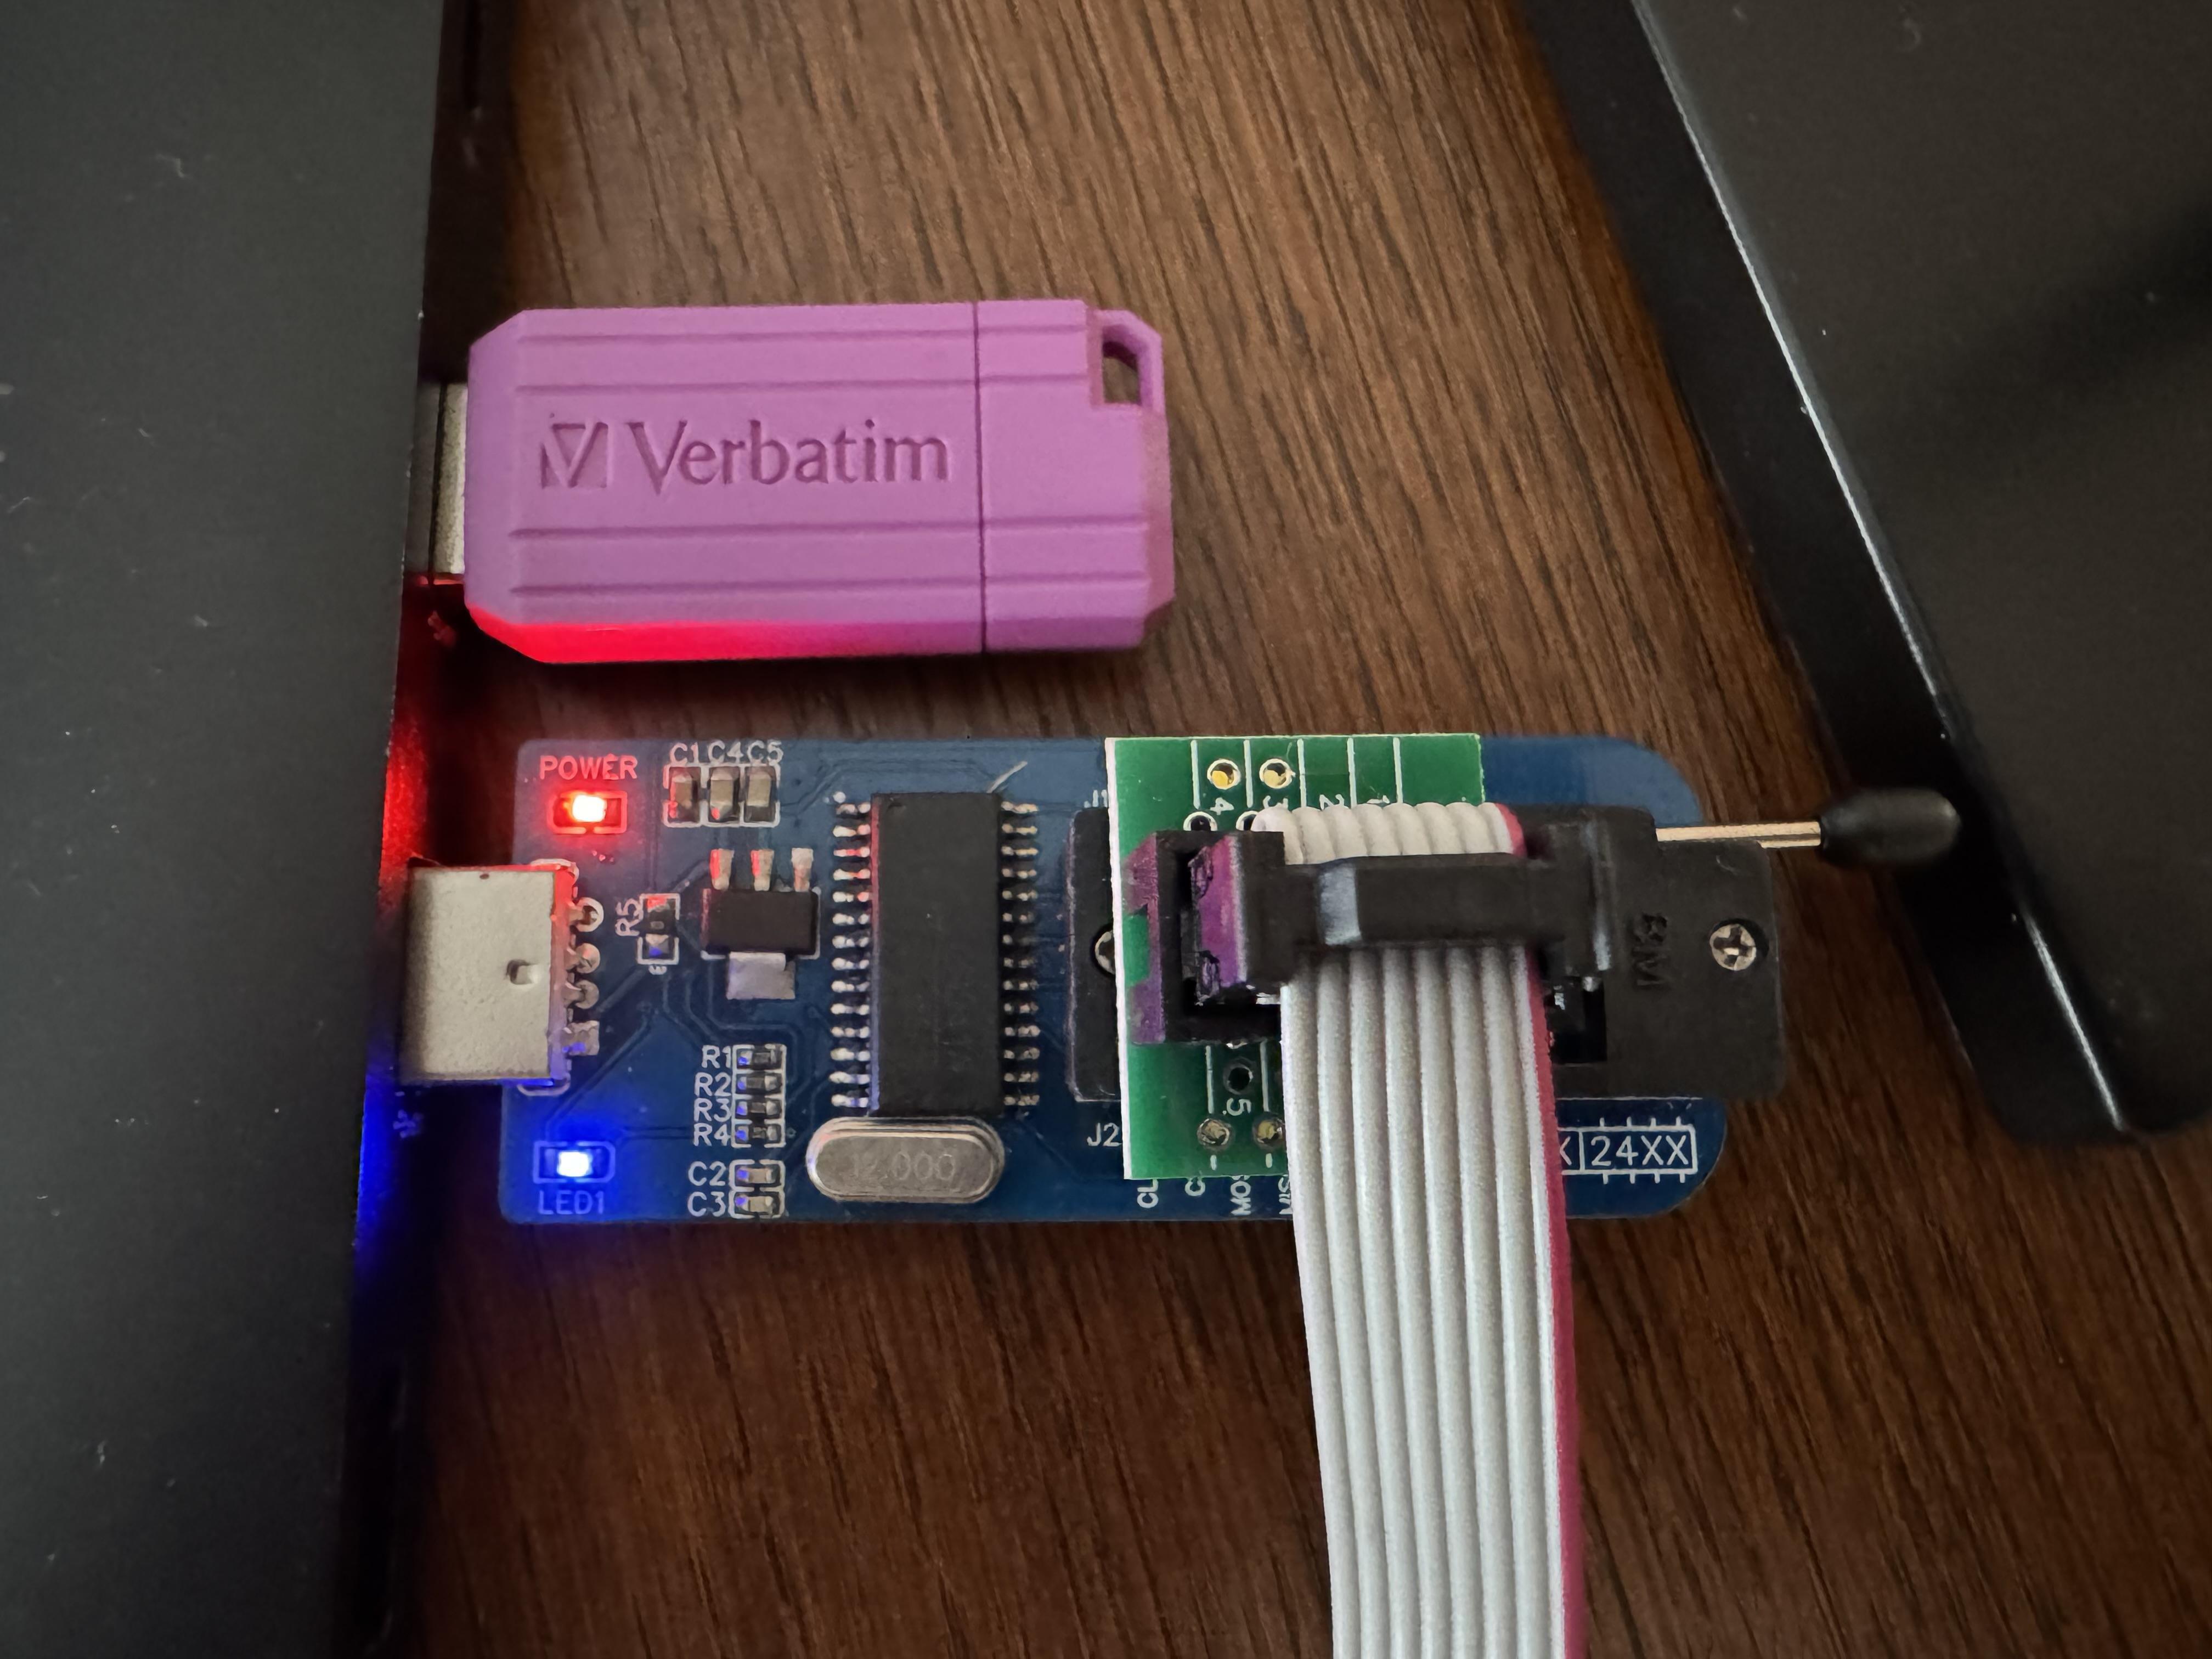
While everything goes well you should see the blue LED on the programmer.
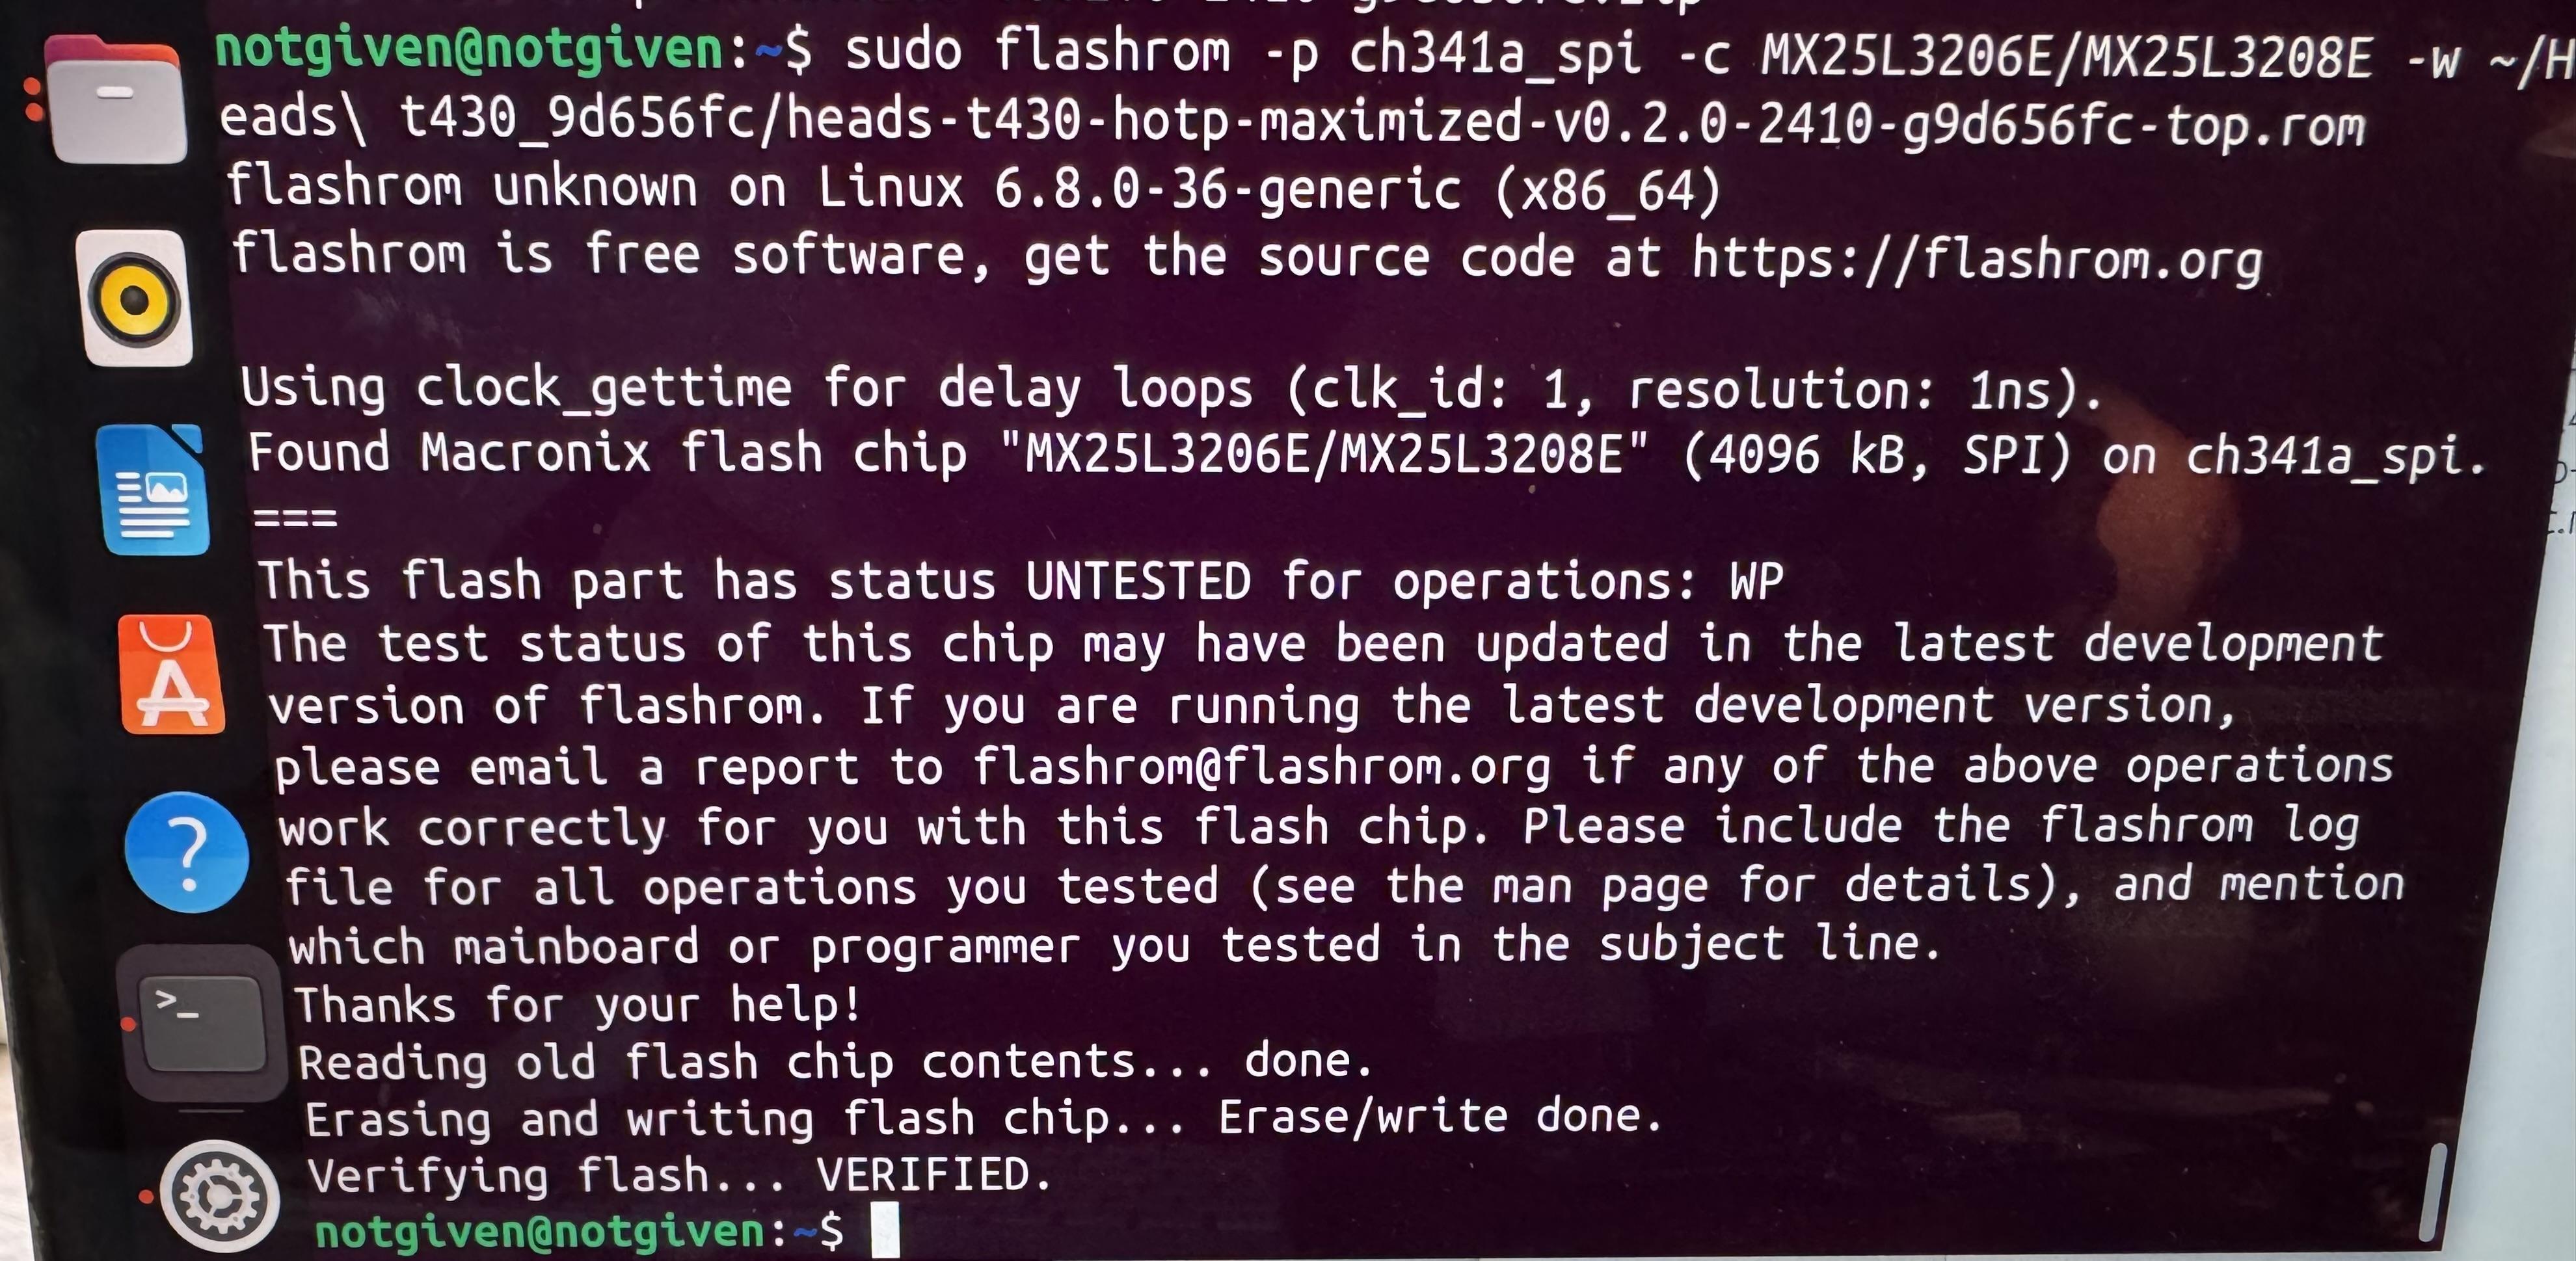
Here is a successful attempt.
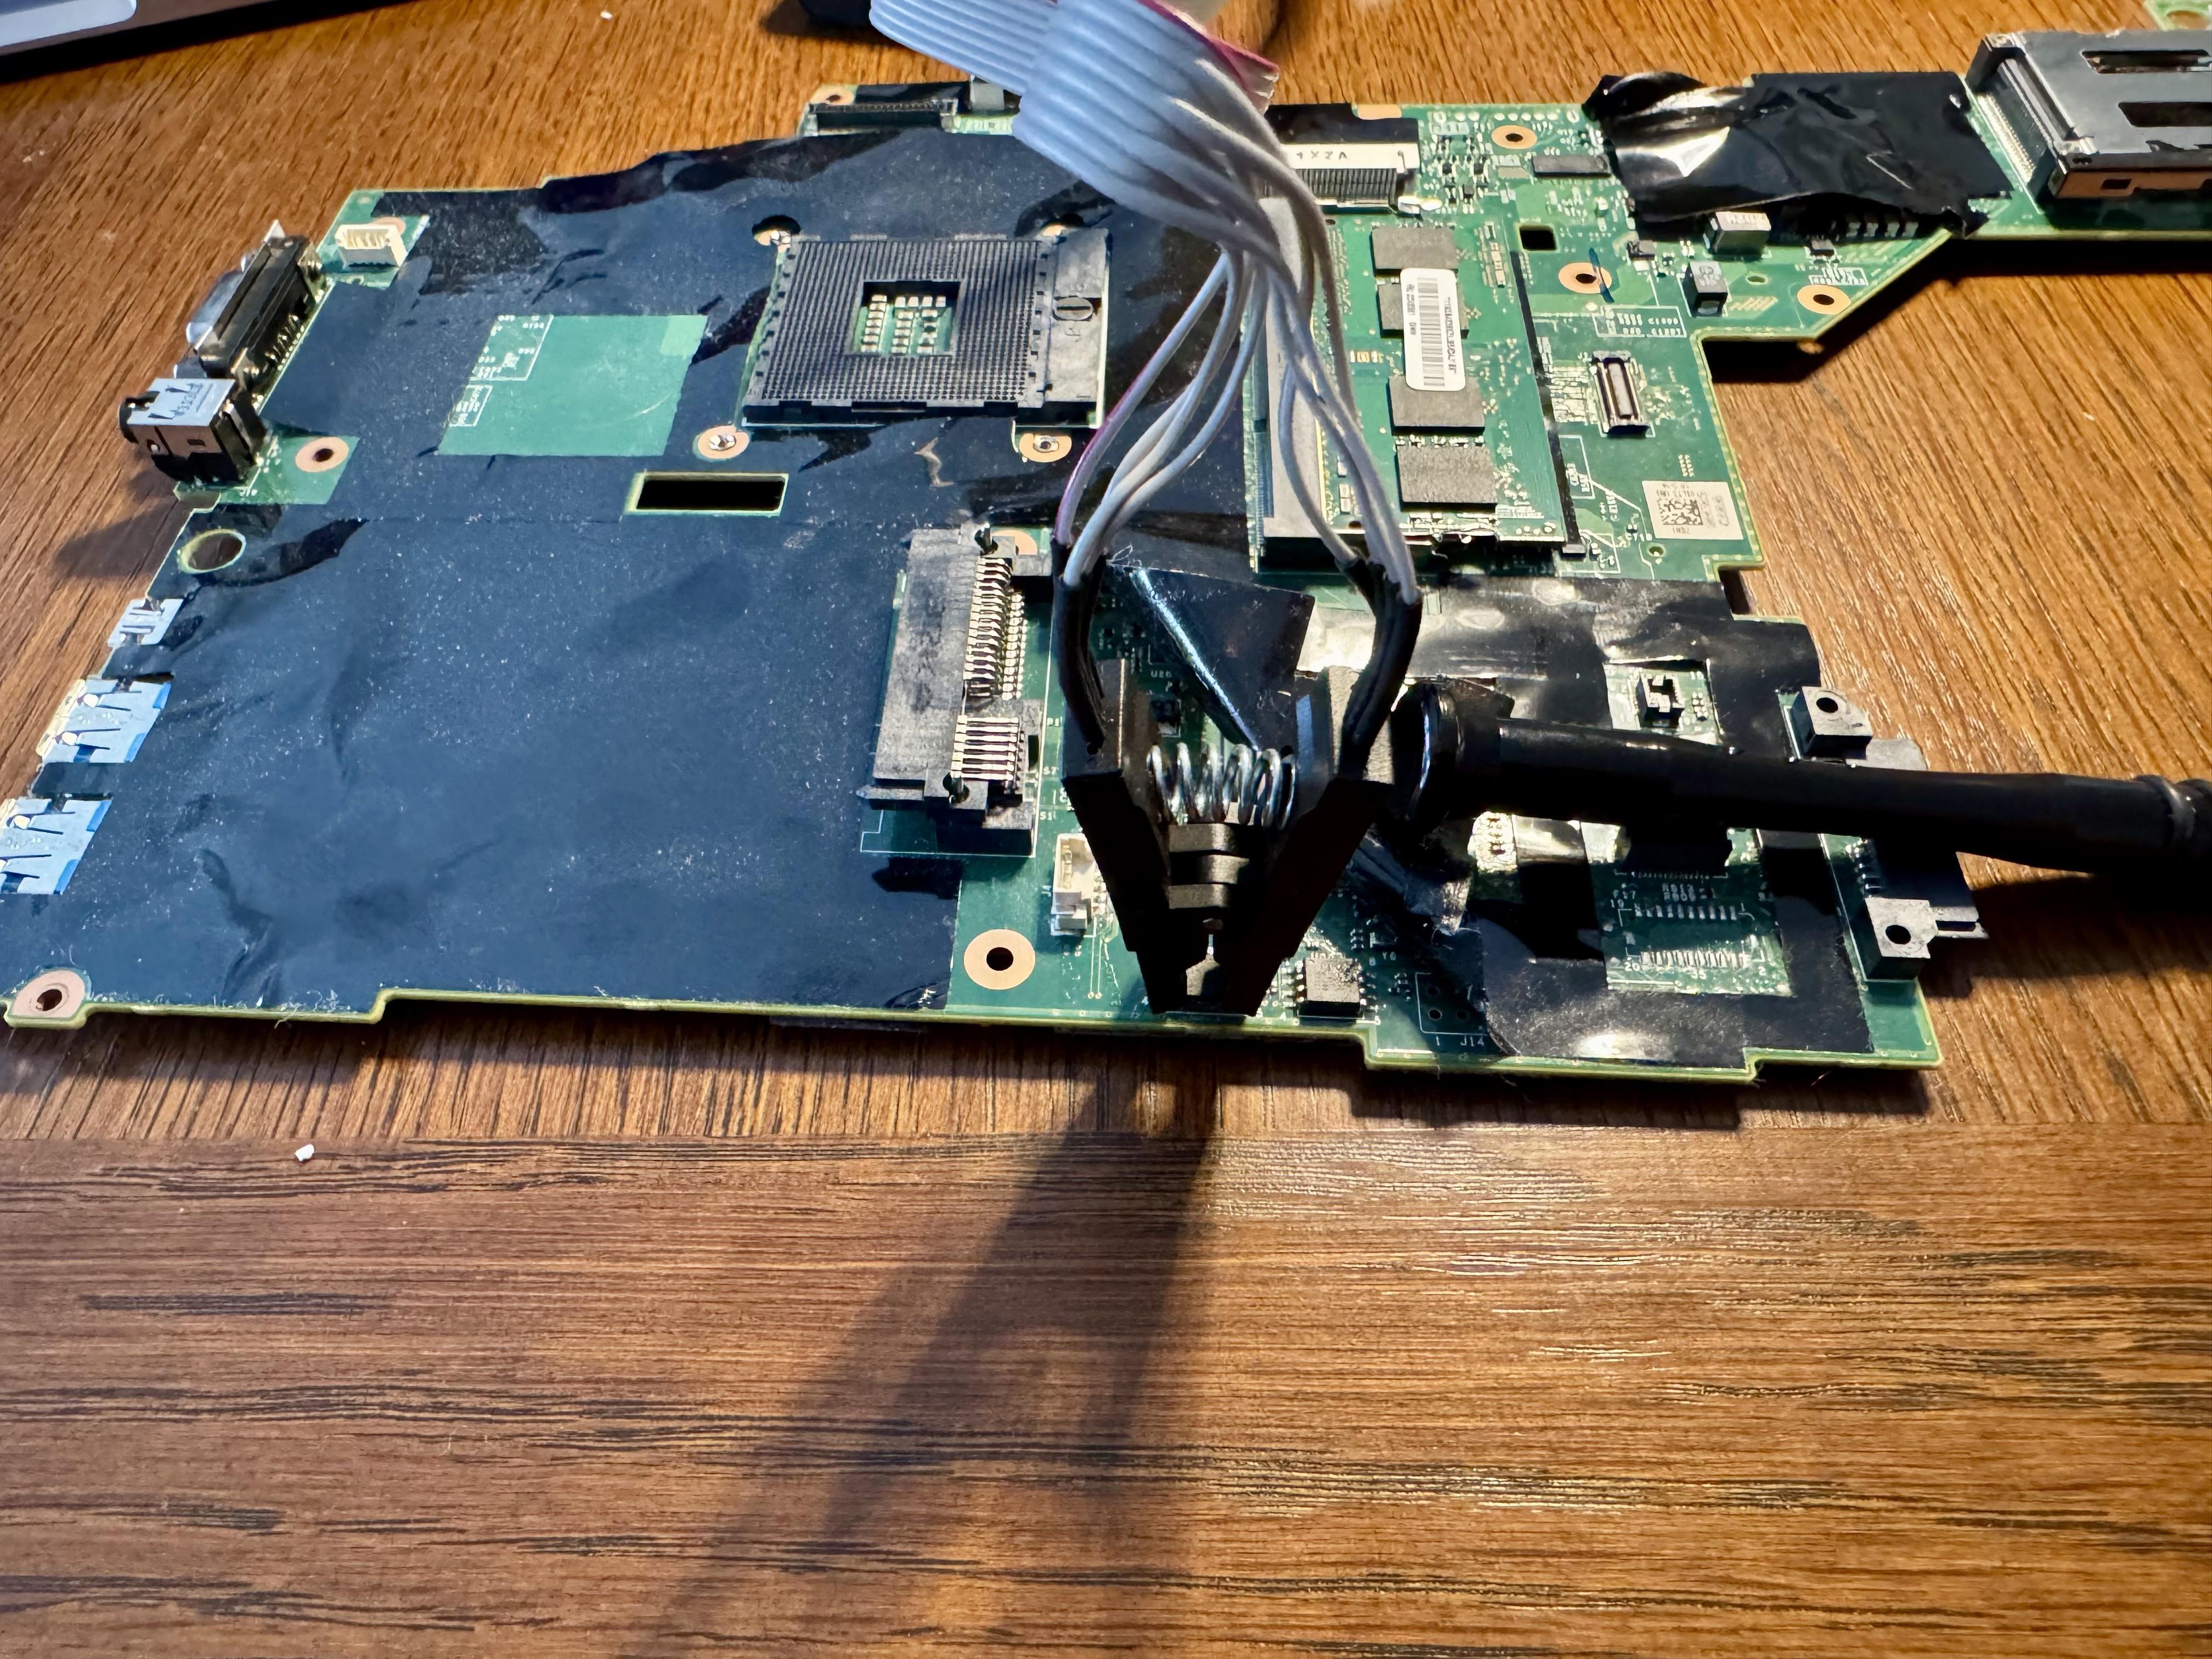
Try to read the name on the bottom SPI flash chip. Then, connect the clip and ch341a programmer to the bottom SPI flash chip.
Use [flasher] of your choice (flashrom or flashprog – see Tool Interchangeability) with the programmer you selected ([programmer] – see Programmer Selection):
sudo [flasher] --programmer [programmer]
Here is my output.
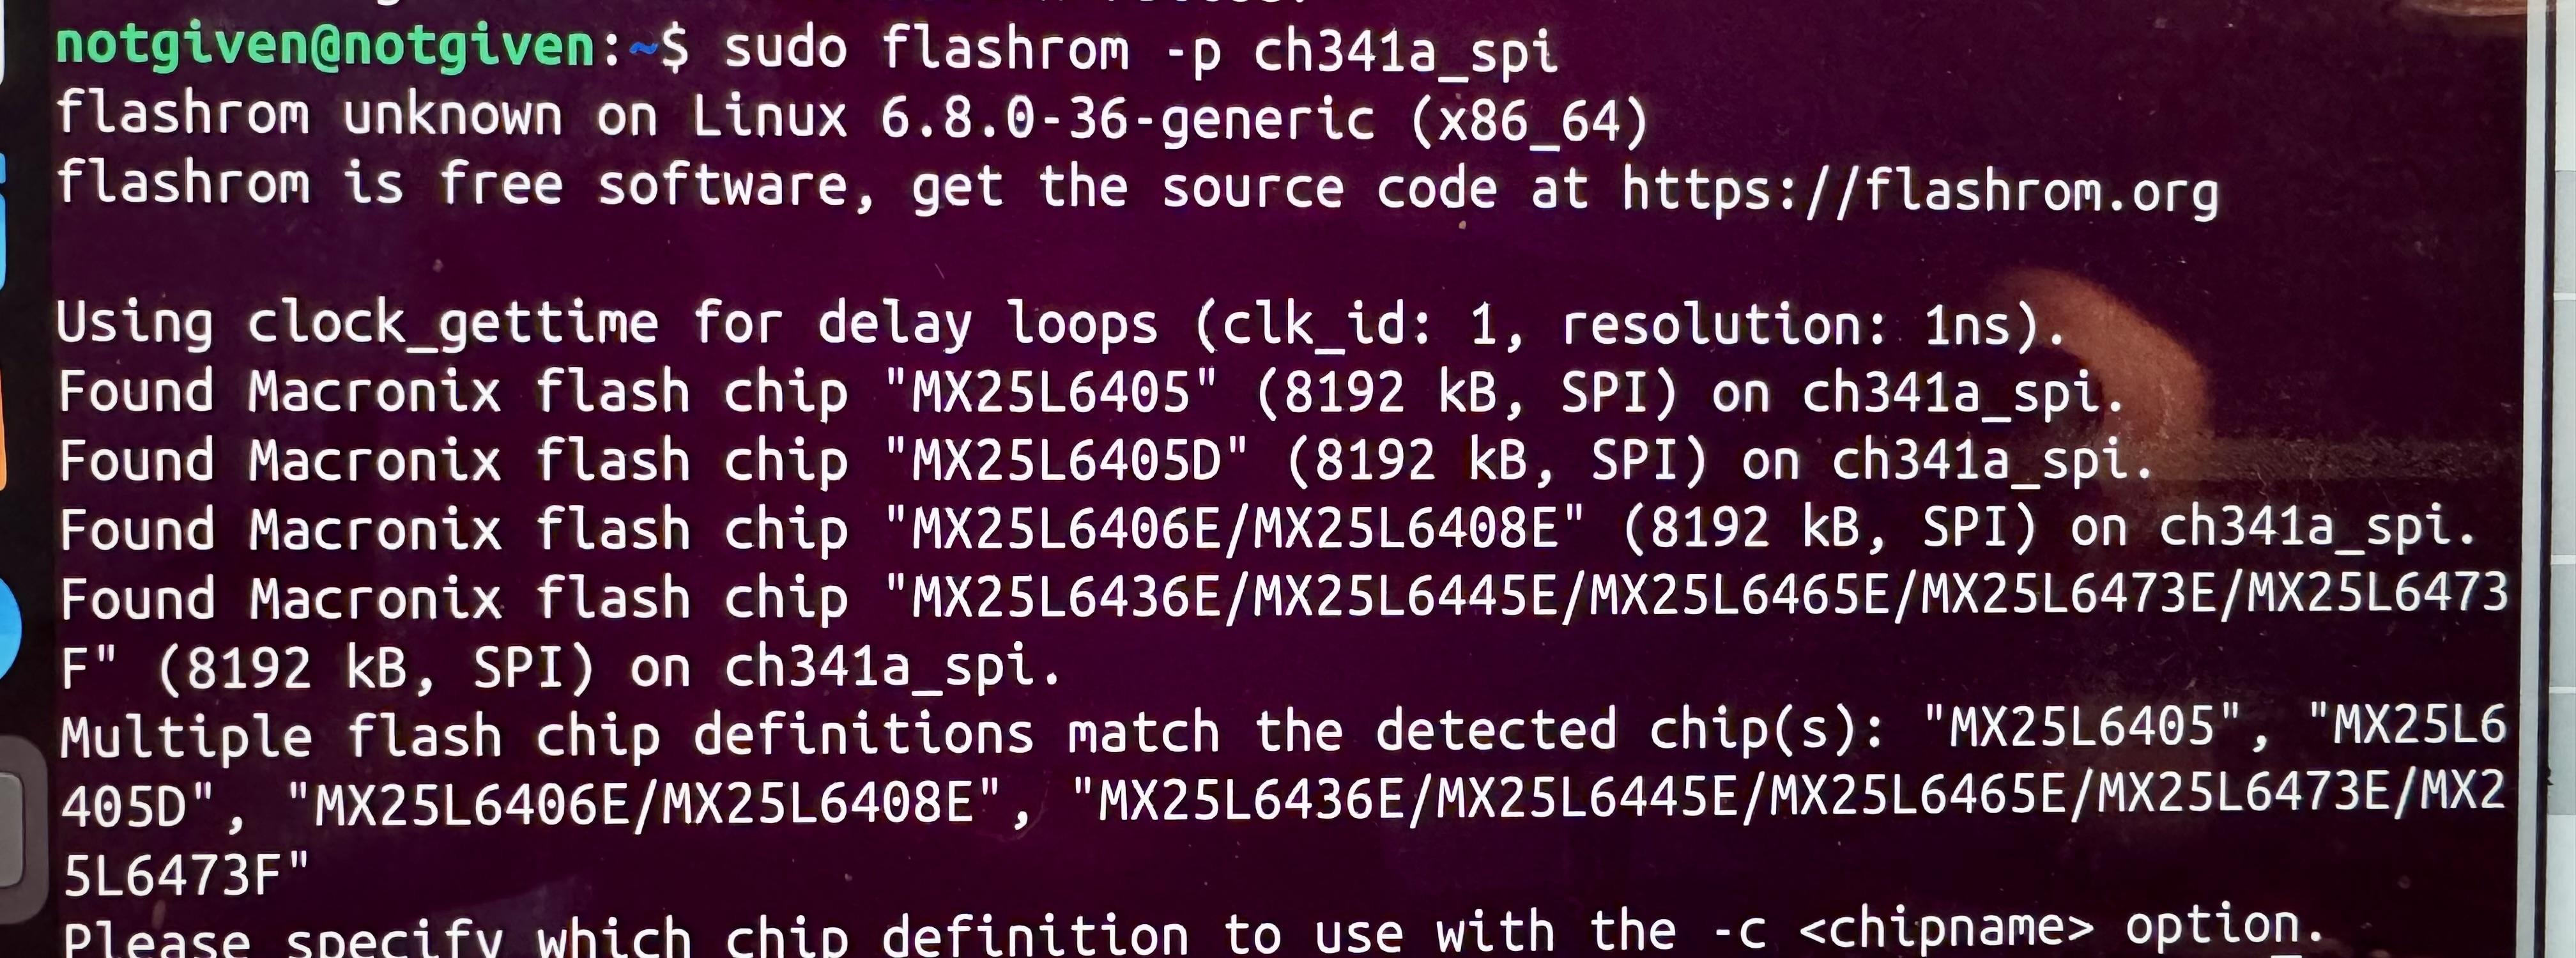
Find the chip and create a backup and verify it (For me the SPI flash chip is ZZZ):
sudo [flasher] --read ~/bottom.bin --programmer [programmer] --chip ZZZ && \
    sudo [flasher] --verify ~/bottom.bin --programmer [programmer] --chip ZZZ
The 8M bottom chip contains the ME firmware. It is neutralized in maximized version. You can flash it specifying the same chip you found under ZZZ:
sudo [flasher] --programmer [programmer] --chip ZZZ --write ~/heads/build/x86/t430-maximized/t430-maximized-bottom.rom
If all goes well, you should see the keyboard LED flash, and within a second Heads will boot in its GUI.
Two reboots are sometimes needed after flash. Force power off by holding the power button for 10 seconds. Since the memory training data was wiped by the content of the full flashed ROM, this is normal.
You should then follow through with configuring keys.